Upcycle your old bulletin board for back to school season
As an educator and mother of 3, Scherrie Donaldson is a Cricut creator who’s passionate about the back-to-school season! Read through her post below and learn to upcycle your old bulletin board for the new school year.
Organization is a critical skill in every student’s academic life, and using this skill starts from an early age. The back-to-school season is usually packed with shopping for new school clothes, gear, books, and technology. But have you ever thought about designing a designated display space or school command center for your child?
Creating a back-to-school bulletin board where your child can organize their days, display any work they are especially proud of, keep track of important dates/events, and be reminded of powerful self-affirmations is a project that they are sure to be excited about! Cricut machines are the go-to technology to create a customized piece like this for the upcoming school year and beyond.
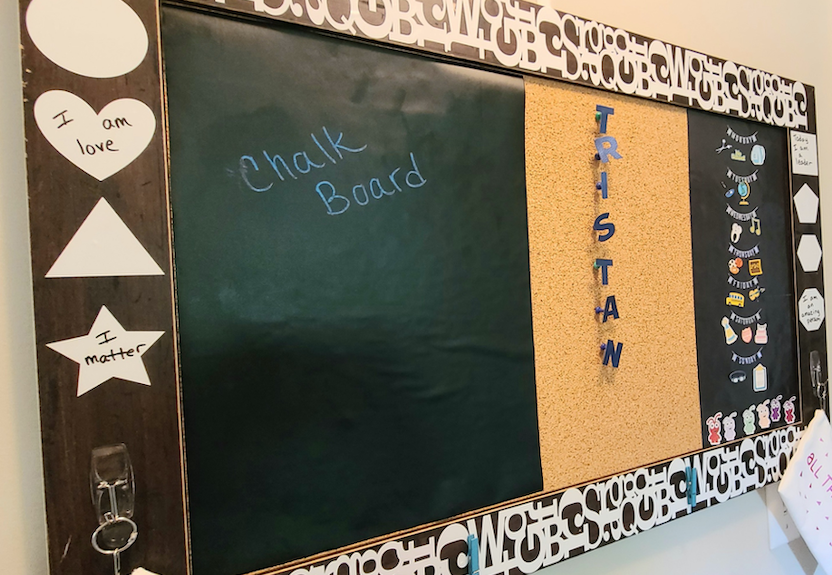
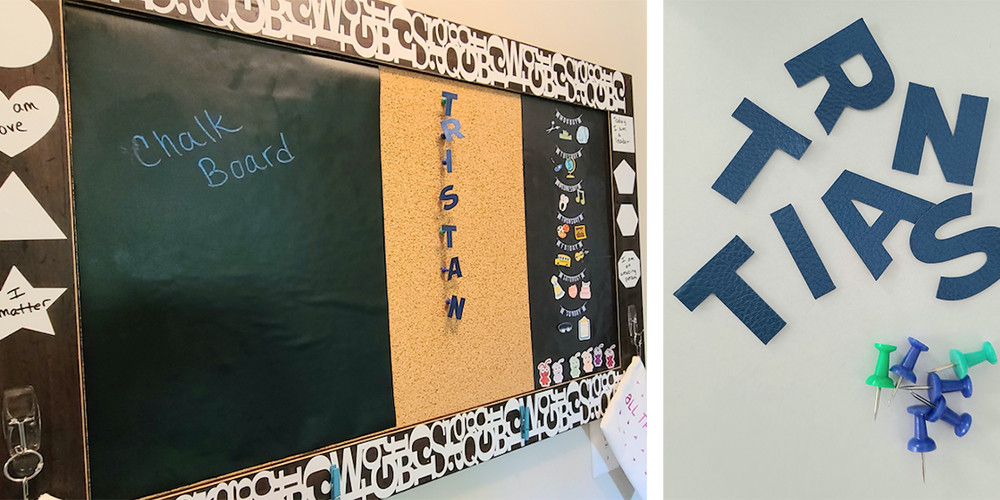
The finished bulletin board features several sections: a magnetic calendar, a corkboard with personalized push pins, a chalkboard section, dry-erase shapes for affirmations or notes, hooks to hold bags of school supplies, clips for additional notes, and a cool border. Let’s get started!
For this project, I used:
- Cricut Maker
- Cricut Joy
- Cricut EasyPress Mini
- Cricut Dry-Erase Vinyl
- Cricut Chalkboard Vinyl
- Cricut Permanent Vinyl (White)
- Cricut Faux Leather Sheets
- Cricut StrongGrip Machine Mat
- Cricut Transfer Tape
- Cricut Weeding Tool
- Cricut Scissors
- Cricut Joy Smart Iron-on Holographic
- Cricut Joy Smart Vinyl Holographic
- Cricut EasyPress Mat
- Cricut Cosmetic Bag Blanks
- Printer
- Hot Glue Gun
- Push Pins
- Mini Clothespins
- Removable Hooks
I started on the smaller aspects of the project first, creating and saving them in Cricut Design Space. Step 1 involved searching Design Space for images that could represent some of the activities my children participate in to create magnets for the magnetic part of the bulletin board.
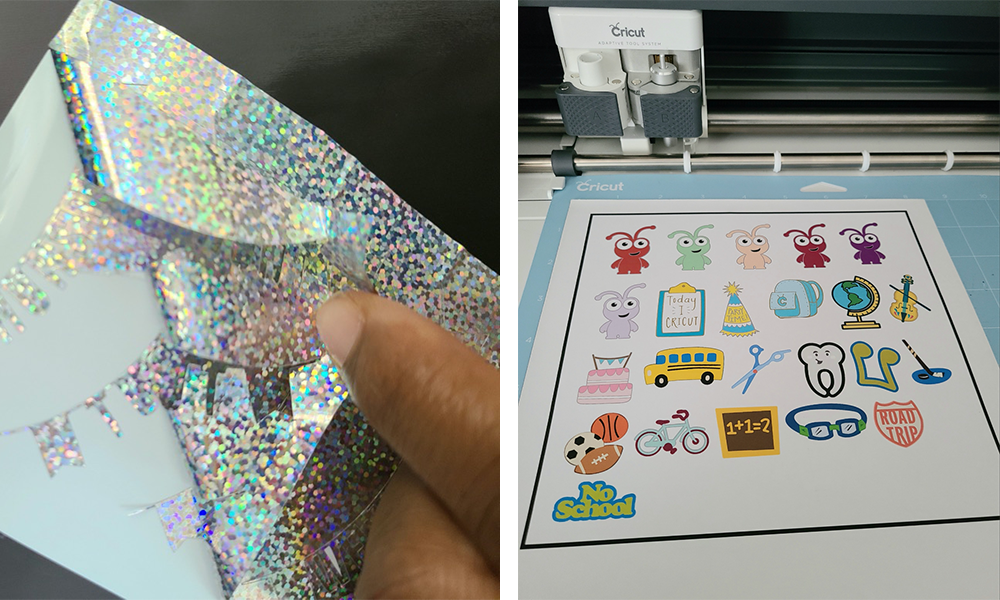
I used a violin for instrument classes, swim goggles for swim class, a test paper for tests, sports balls for sports practice, a tooth for dentist appointments, a school bus for field trips, and more. I also had to include some Cricut Cutie magnets for decoration!
These were printed out on magnet paper– then I used Cricut Maker to cut them out. Cricut Joy and Smart Vinyl Holographic materials were also used to print days of the week images for the magnetic calendar.
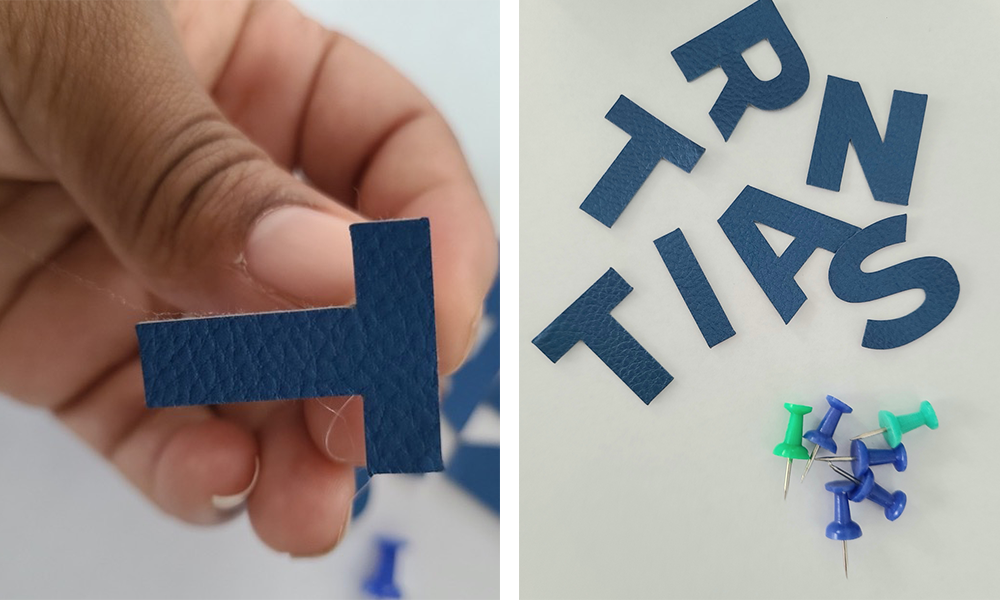
Next, I created personalized push pins using Cricut faux leather. We found a thick font in Design Space and used Cricut Maker to cut out the letters we wanted. Once cut, we hot glued the letters to the top of push pins.
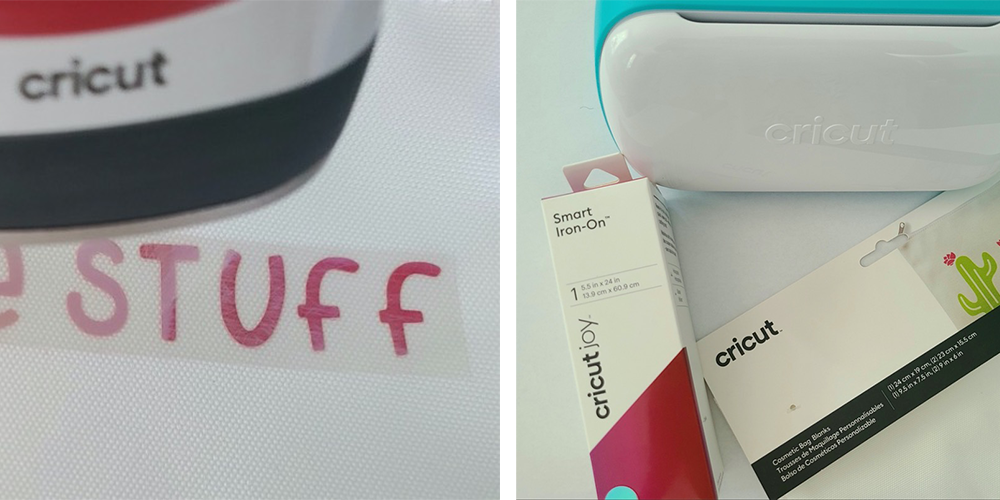
The “All the Things” and “All the Stuff” school supply pouches were created using the Cricut Joy and Smart Iron-On Holographic material. After creating a fun design in Design Space, make sure to mirror the imagery and any words — this will ensure your design is legible when ironed onto your material! To add some additional flair, we also cut up some of the excess vinyl material to create the look of “sprinkles.” Then we ironed on our design using the Cricut EasyPress Mini.
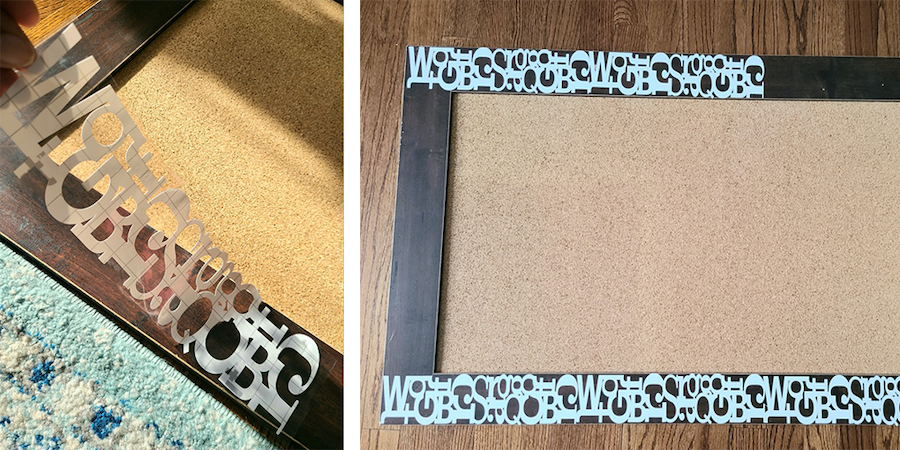
To decorate the border of our bulletin board, I decided to use the “Close to My Heart” border design in Design Space. The jumble of letters fit perfectly with my schoolhouse theme!
I measured the top and bottom of the bulletin board and used Cricut Maker to cut 6 panels of the border design (3 applied to the top and 3 applied to the bottom). After cutting, I weeded and applied the vinyl pieces to the board using Cricut transfer tape.
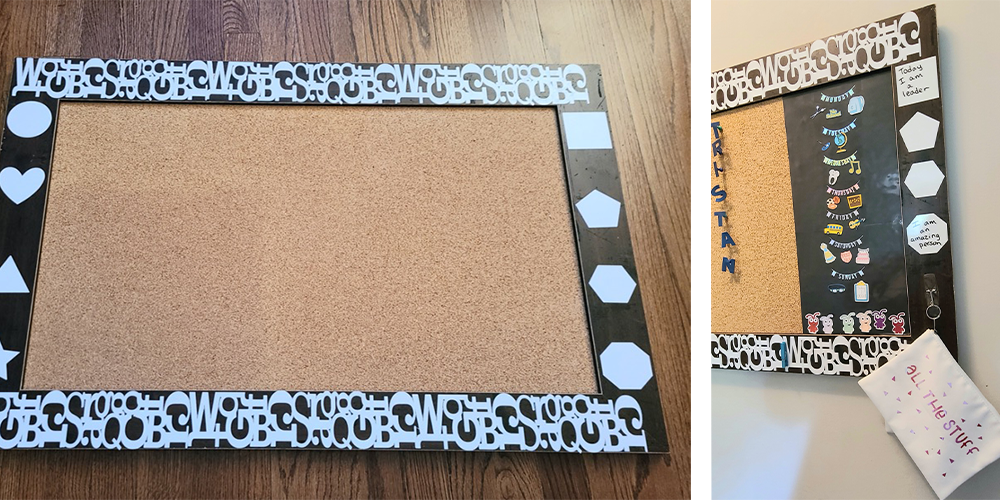
I also used my Cricut Maker to cut basic shapes from Design Space to create dry-erase elements to add to the sides of the bulletin board. This allows students to write in their own affirmations and responses, or simply express themselves artistically!
Putting the whole design together was simple. I attached magnet sheets to one side of the board, left the middle as a corkboard, and on the other side, I attached a piece of Cricut chalkboard vinyl that I measured and cut. Then, I added the vinyl days of the week and all the magnets I made to the magnetic weekly calendar section.
The faux leather personalized pushpins were added to the corkboard section. I attached two removable hooks to the bottom two corners to offer a place for the kids to hang their school supplies. Then, I used hot glue to attach two mini clothespins to the bottom for any additional notes or learning accessories.
This personalized back-to-school bulletin board or academic command center is sure to keep your little scholar organized, motivated, and prepared for the upcoming school year. I can’t wait to see how you customize yours!
Related Making


Search How-To
I want to make...