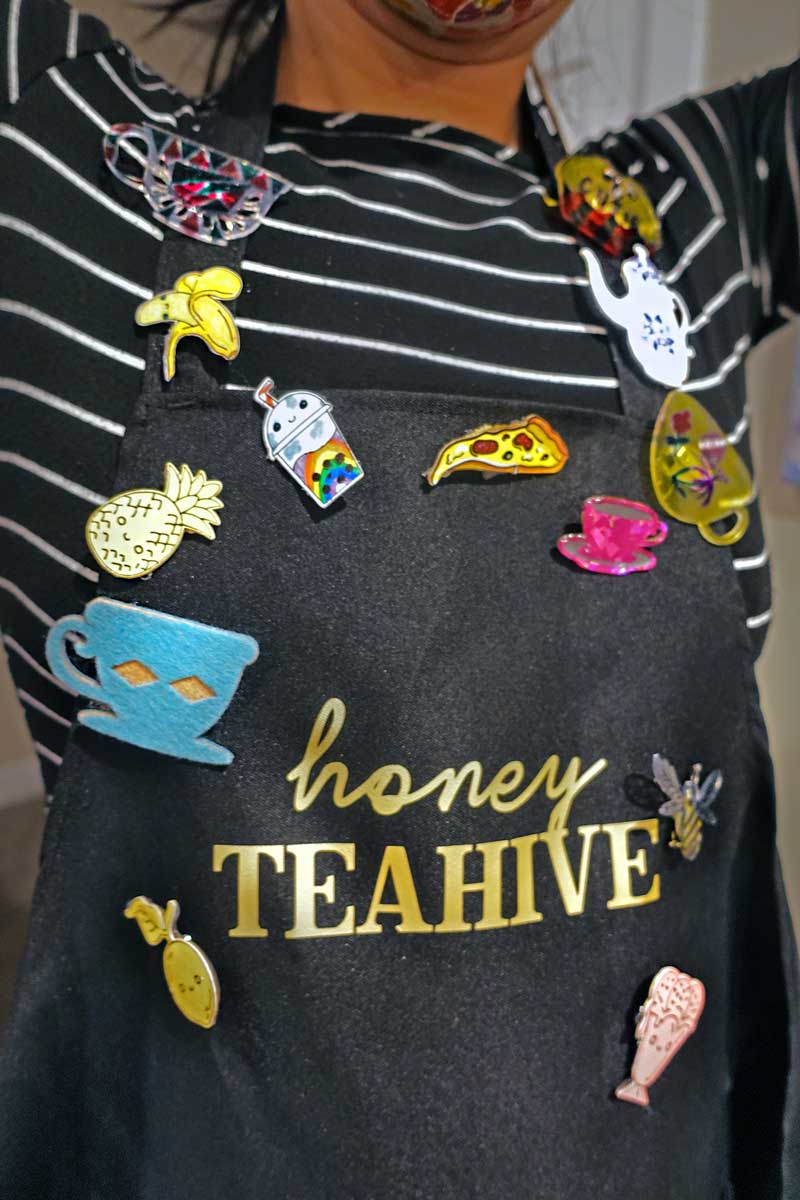
Pies for days: 5 ways to DIY pins for Pi Day
Apple pie, pumpkin pie, pizza pie, banoffee pie, shepherd's pie, mud pie, shoofly pie, key lime pie, lemon meringue pie, chicken pot pie... The possibilities are endless!
Similar to pies, the possibilities are endless with Cricut, too.
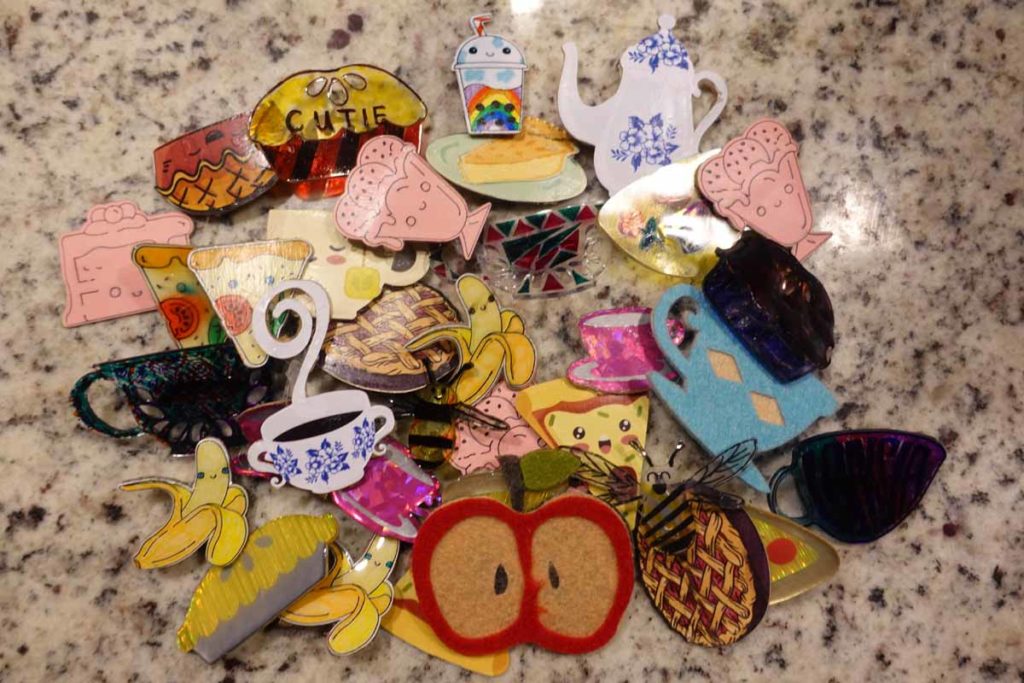
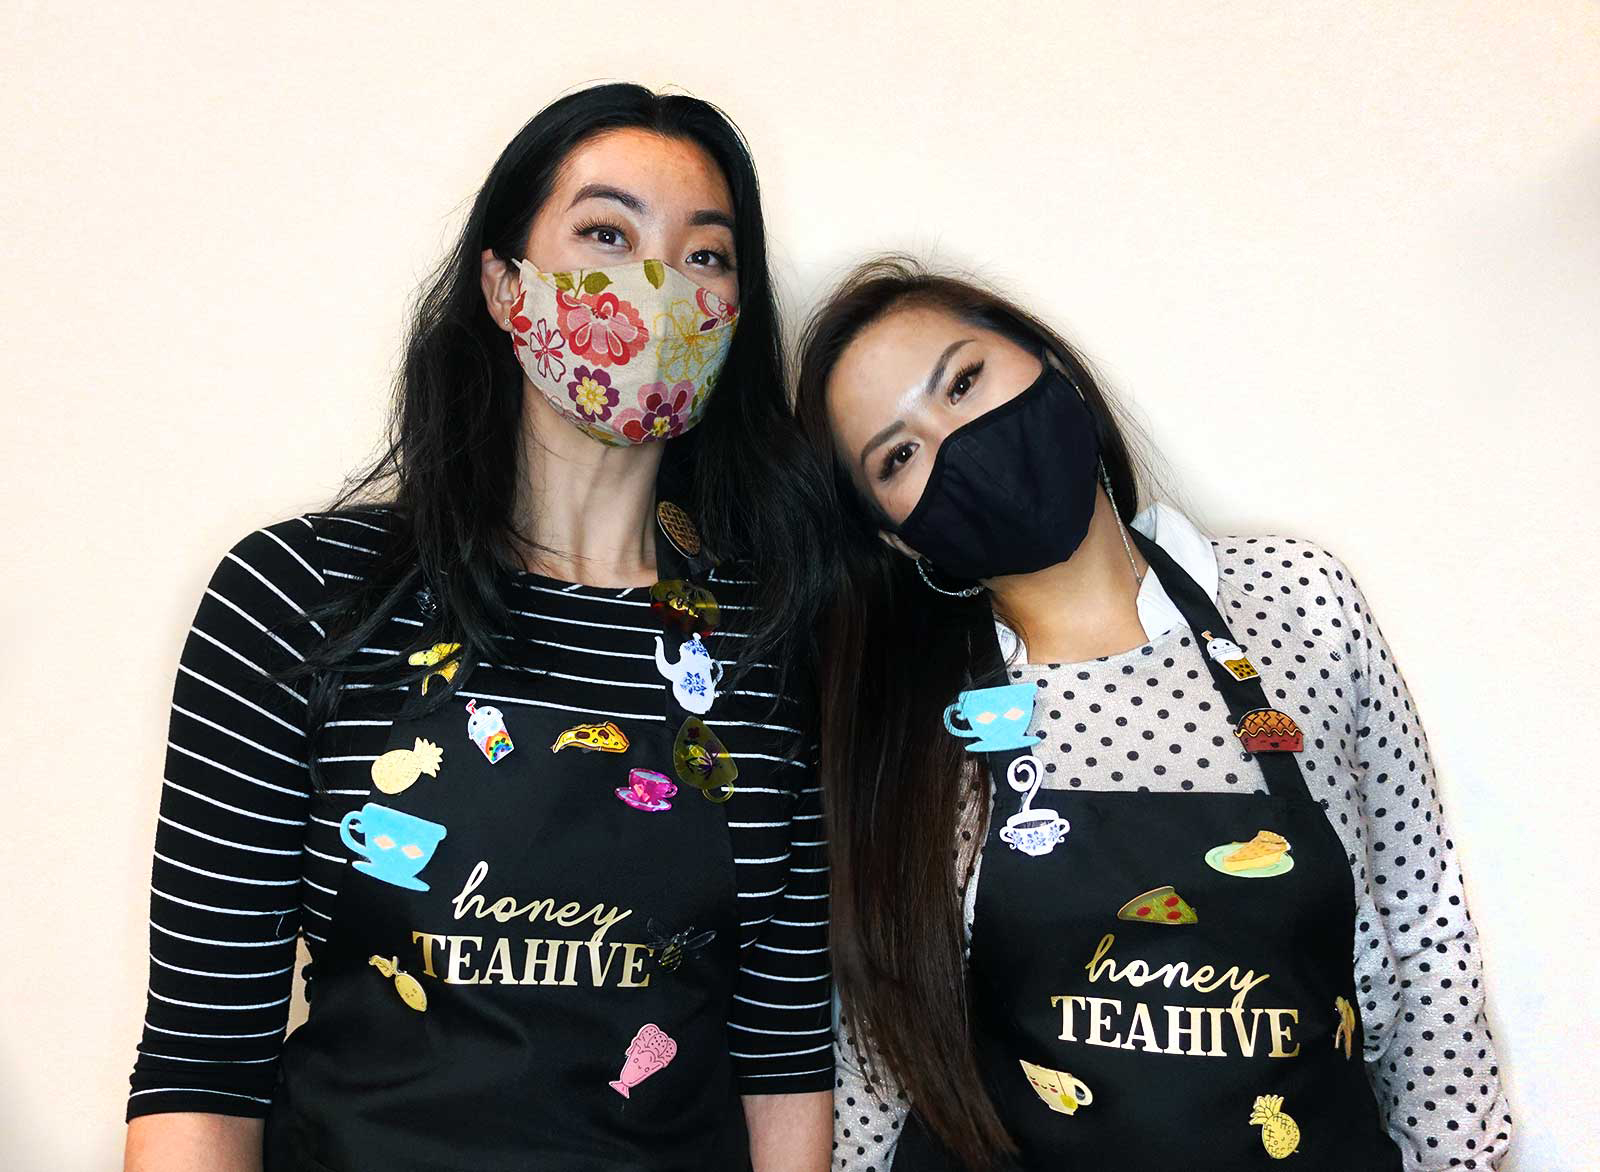
For Pi Day (3.14) this weekend, my friend allowed me the opportunity to create a pie-inspired menu for her catering business. In turn, that inspired me to create fun pins and buttons for the occasion. Using felt, vinyl scraps, paper, shrink film, and bottle caps, here are 5 different ways to make pins (or buttons, or badges) with help from your Cricut smart cutting machine.
Getting started
There are several methods that I used to create pins using your Cricut smart cutting machines. In general, they are interchangeable for any application below, so here’s a brief on each method.
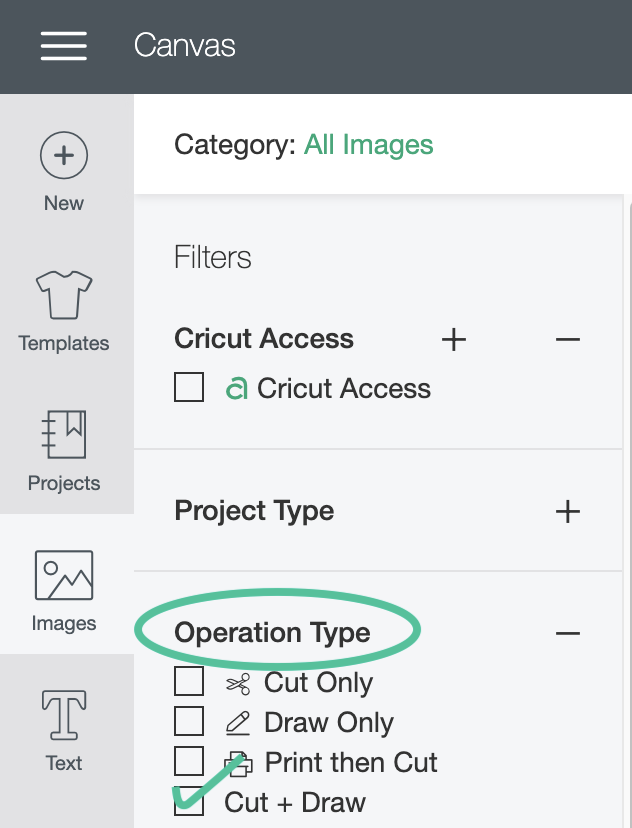
Print Then Cut images
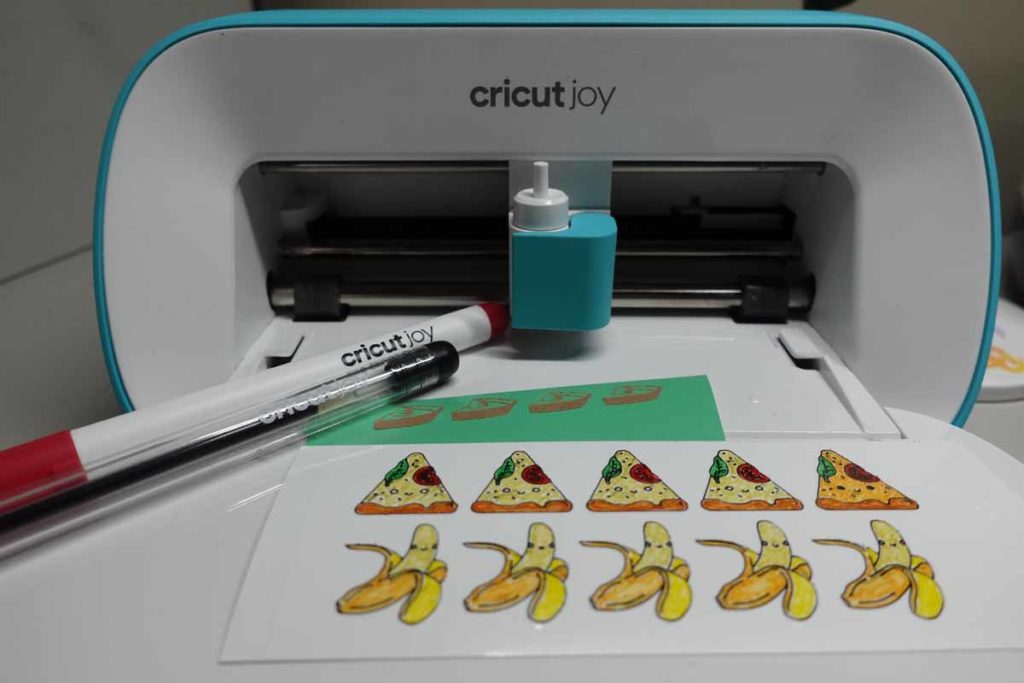
For easy colorful images off your printer to your Cricut machine, use Print then Cut images! Cricut Access™ offers many different images that are Print then Cut – you can filter for this type of image under “Operation Type” in the Design Space software.
Print then Cut onto printable vinyl or printable sticker paper to stick directly to a backer. Or, Print then Cut onto copy paper then adhere it to a backer. I don’t have a printer but my good friend, and co-worker (you may know her), Anna Rose, offered to help! We used printable sticker paper on paperboard backers using decoupage and hot glue to seal.

back to top
Layered images
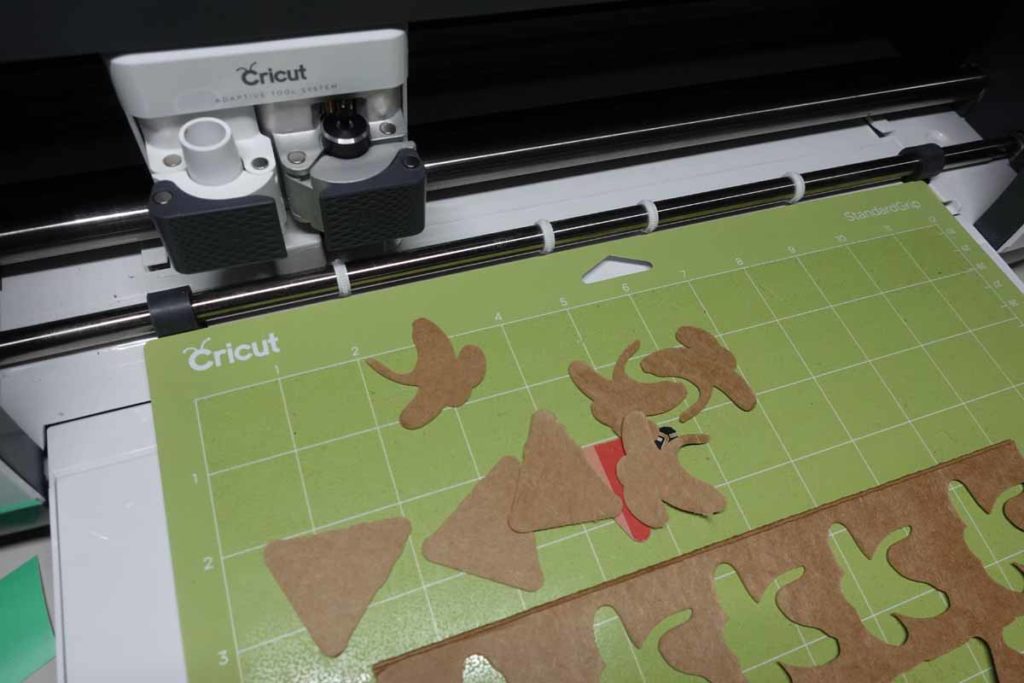
Find layered images in Design Space® by filtering “Layers” to “Multi.” Layered images are great for felt pins or getting rid of vinyl scraps.
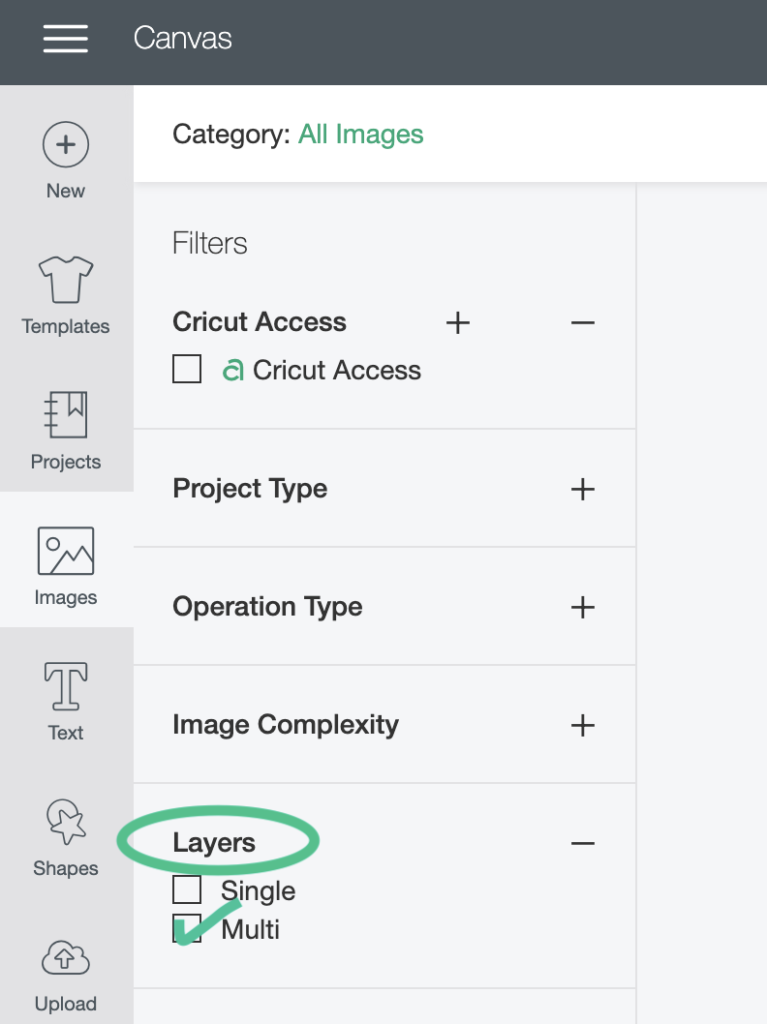
Use the bits and pieces of various vinyl colors that you may have lying around to create the bits and pieces of a layered image. I like having a smaller-sized pin, so these scraps worked perfectly. Check out my multi-media usage of scrap Smart Labels™, Writable Paper (put it on a mat to cut it more accurately) and vinyl.
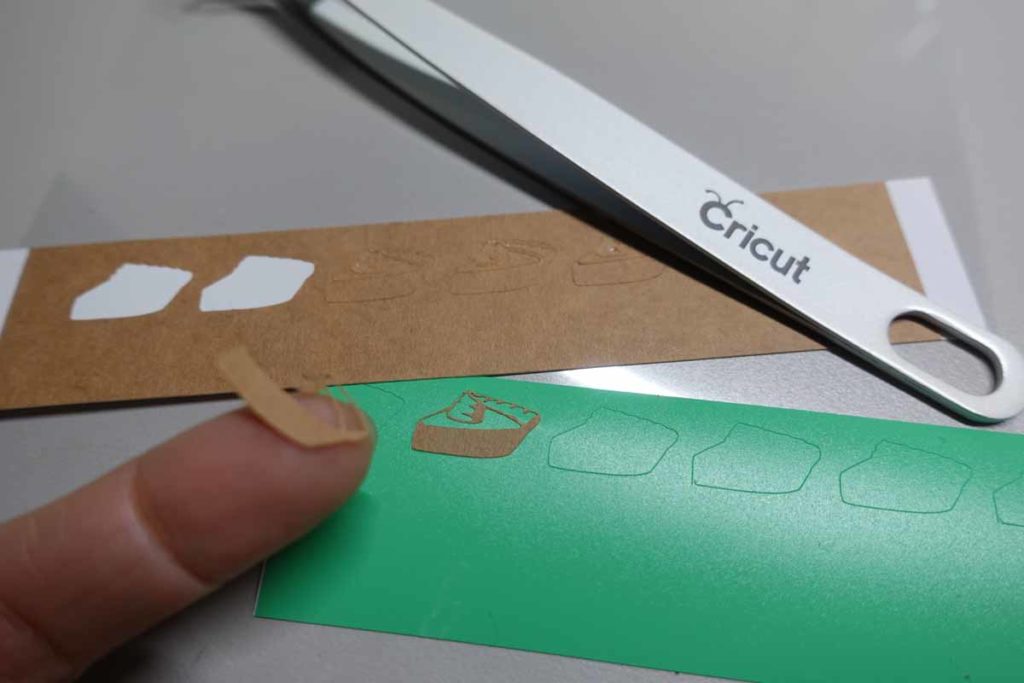
Layer with (or without) the help of tweezers and transfer tape onto the backer of your choice (or resin mold it). Then add a protective seal (no need when using resin). I used decoupage glue, but you could also find a spray. Any type of simple sealing spray will hold together the vinyl layers and keep that pin lasting longer. Since you will add a seal, it won’t matter which vinyl scraps you use – removable or permanent!
back to top
Cut (and draw) images
It’s no secret to my co-workers that I love Smart Labels (and now, Smart Paper™) with Cricut Joy®. They are quick, easy, and so pro-quality. Cricut Joy makes even the tiniest creations look amazing.

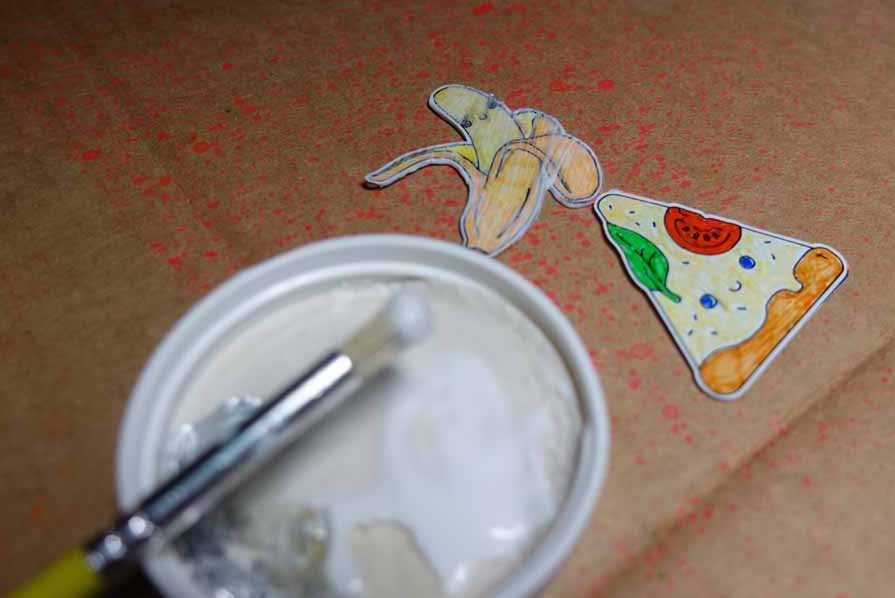
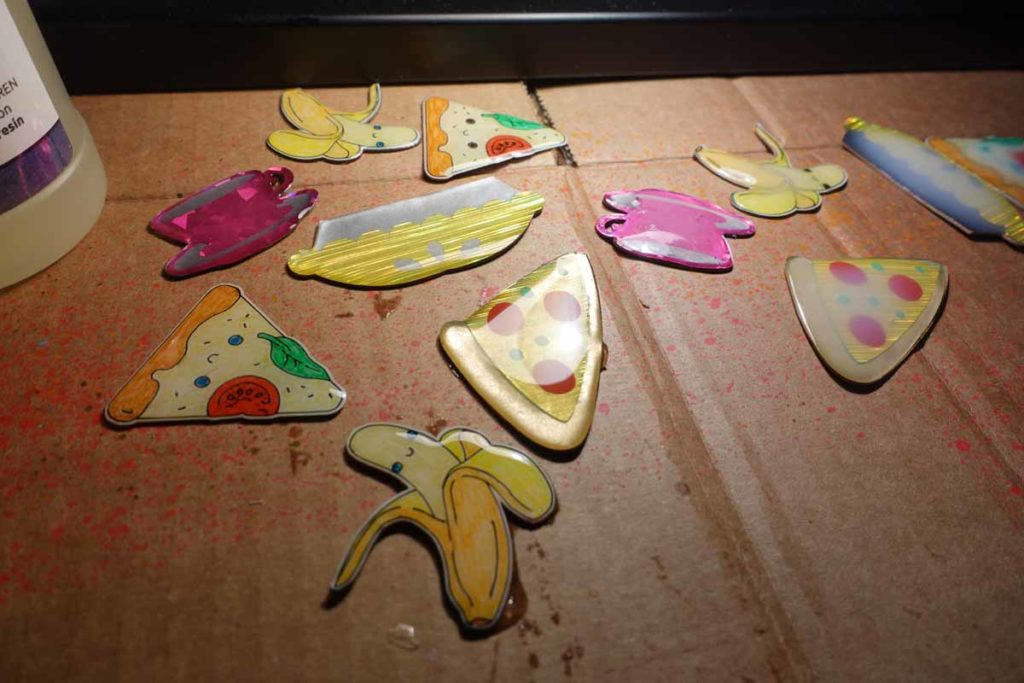
Using Cut + Draw images in Design Space, I created “labels” and colored them on my own. Okay, yes, I do like coloring…
Hey! This could also be a fun project for kids, friends, and general any individual. Have a bunch of these ready to go for a coloring party! You could also do this on regular copy paper or whatever paper you may have lying around the house.
I used Smart Labels, Writable Vinyl, then created some “stickers” with Smart Paper, Sticker Cardstock where I didn’t color them in.
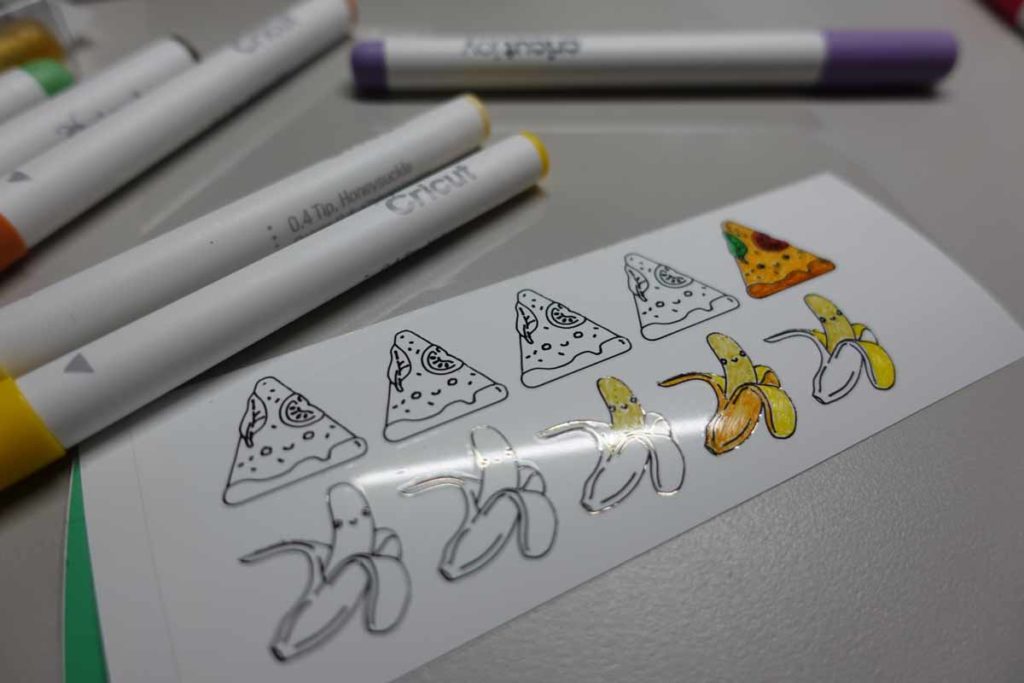
After you color (or don’t color) it in, stick onto a backer of your choice or resin mold it without a backer. If you use paper without an adhesive backing, you’ll just need to find a medium, such as glue, to stick it to your backer. If you use a resin mold, just drop it in – no glue needed.
back to top
Backer and support options
Not all the methods below will need a backing to support or sturdy the pin, but for those that do, here are a few options.
My favorite backing option is paperboard from leftover boxes because I always have it lying around. This can be from cereal boxes, soda and beer boxes, pasta boxes, and many other consumables.
Easily set your Cricut Maker® or Cricut Explore® machine to cut on the “Cereal Box” setting with your deep point blade and (I liked to) cut it twice. Remember, you can always check the cut before unloading your mat if you’d like to run it again.
Other options can include dollar store plastic cutting mats, wood (such as basswood or balsa wood), chipboard, matboard, hot glue (though the clarity and adherence to material may vary), polymer compounds or resin, and plastic cards you don’t use anymore (perhaps a frequent shopper card or something without sensitive information).
Basically, look for something that is sturdy and will add a bit of support but isn’t too heavy to sit on your garment when pinned.
back to top
Handy tools for making pins
I found the following tools and accessories handy for making these pins.
- Hot glue gun with extra glue sticks
- For gluing pin backs or a quick solve to seal the pins
- Sand paper
- For creating a rougher surface so that hot glue or paint adheres better
- Glue
- For putting together felt pins or adding the pin backs
- Decoupage glue
- For sealing pins and adding texture or a little more support to a backer
- Tweezers
- For layering those small pieces of vinyl or working with more delicate pieces
- Small plastic ramekin and toothpicks and gloves
- For mixing resin
- Paper towels or a cloth rag
- For all those messes
- Work surface that can handle the chaos
- For piece of mind… and all that glue, resin, vinyl pieces, random scraps, and more that can get stuck onto your work surface
back to top
Decoupage pins
Decoupage pins are simply pins sealed with decoupage glue. Create your pin with any option above, attach to a backer, and seal both sides with decoupage glue, such as the popular Mod Podge brand.
I recommend using a soft bristle brush or foam brush to help eliminate texture that can be created from a stiff bristle brush. And, I also gave it at least 5 coats per side for a sturdier feel.
back to top
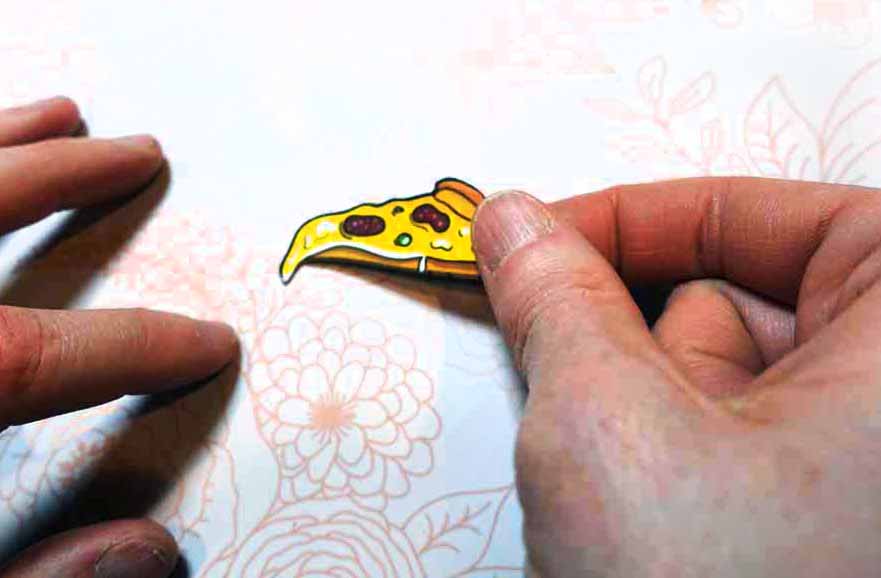
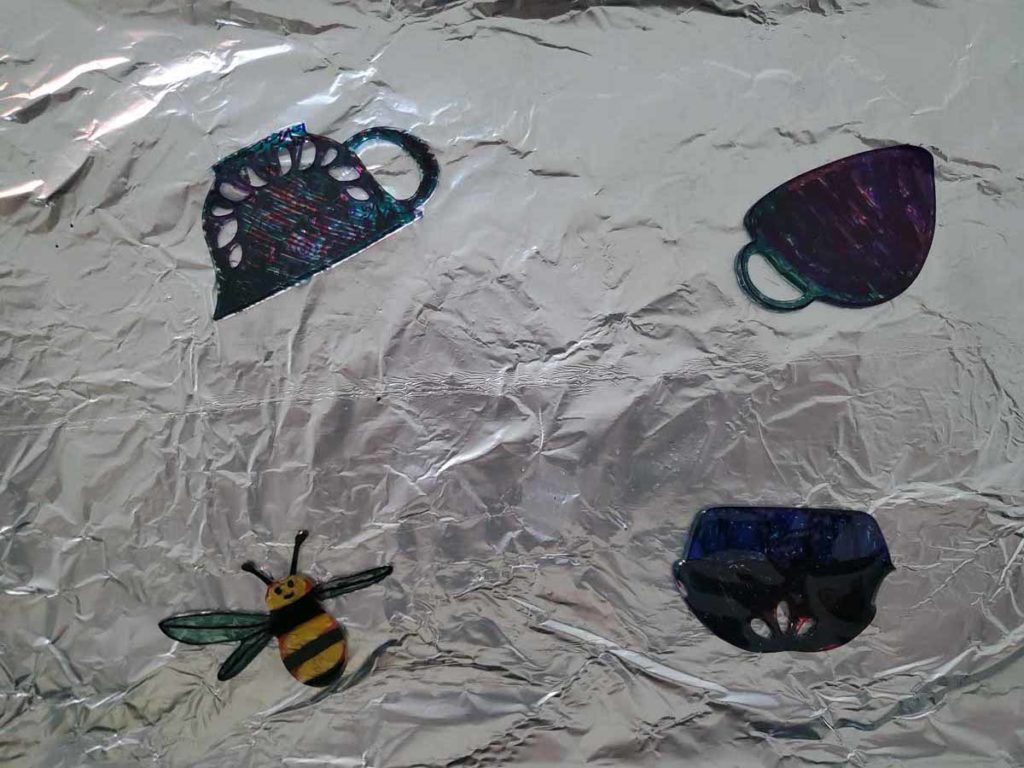
Shrink film pins
Shrink film is a flat sheet of material that shrinks to harden into a tough, durable plastic piece. It’s often used for jewelry making. You can cut shrink film with your Cricut Maker or Cricut Explore machines. I used my fine cut blade at a maximum pressure of 350 with 6x runs by creating a custom material settings in Design Space.
After I cut the image shape I wanted with my machine, I colored it in with permanent markers. You could also paint the cut images too – just be sure that the shrink film has a rough surface so that the paint adheres.
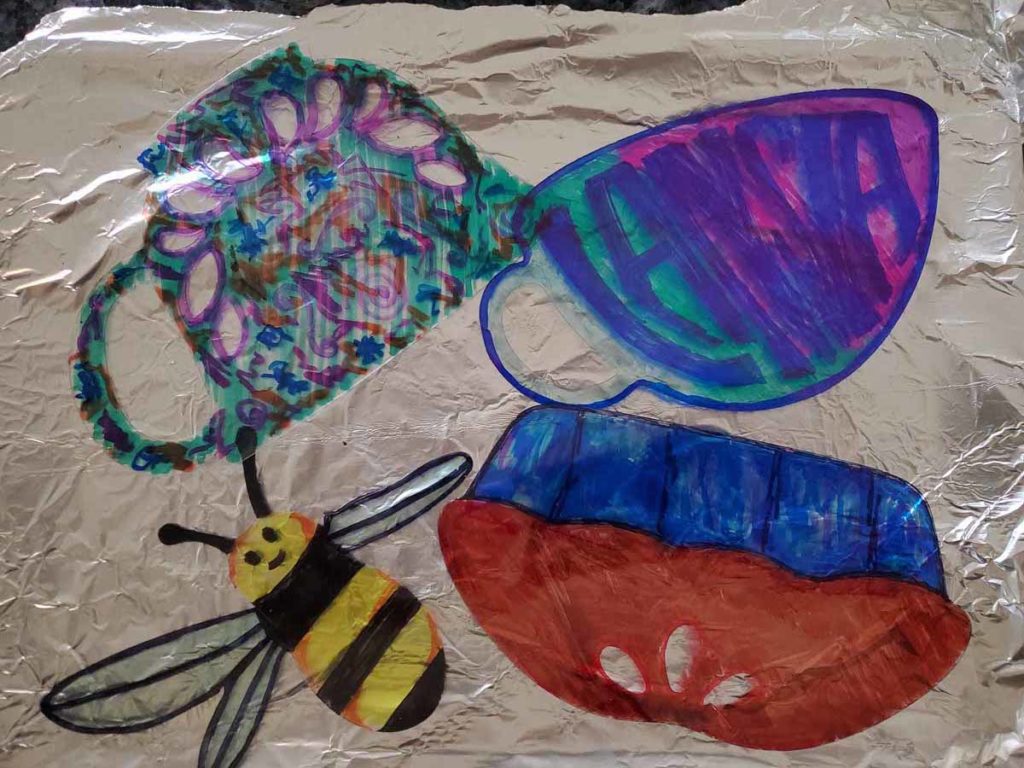
Bake the finished (colored) image in the oven according to the directions on the shrink film packaging and hot glue a pin back! No need for a backer or sealant. Note how much more intense the colors become and how much it shrinks! This may vary depending on the brand of shrink film you purchase… I used Shrinky Dinks.
back to top
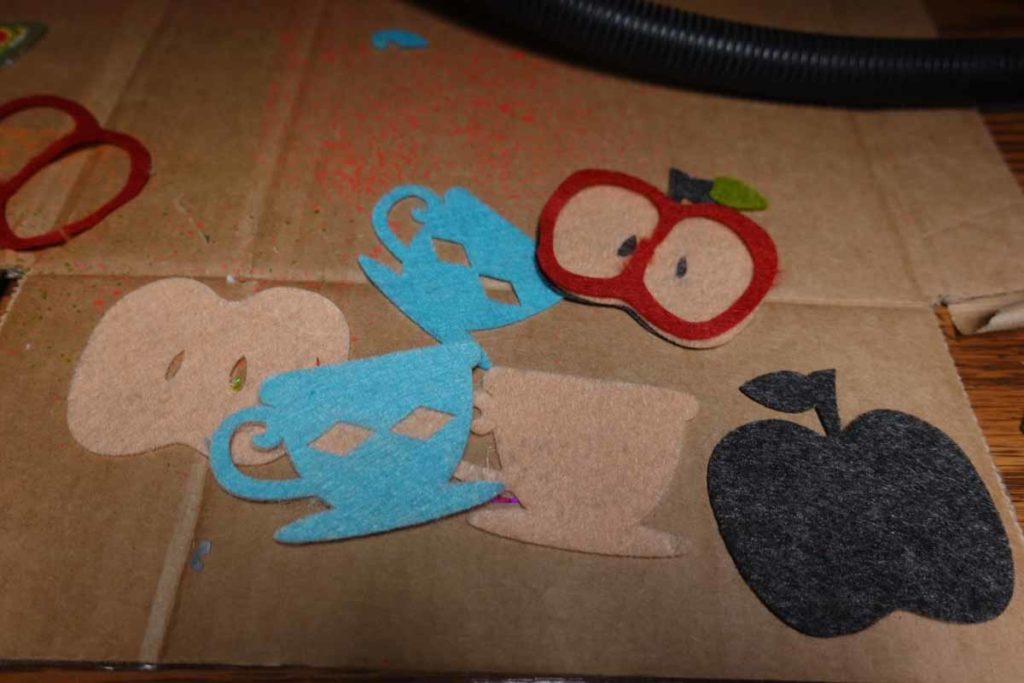
Felt brooch pins
For felt pins, I used layered images. Cut the pieces of felt according to your layered image and glue together. The multiple layers of felt should provide enough stability, but if you feel like it may need another level of support, cut a paperboard backer. Glue the paperboard backer into the middle of the project to hide it from sight. Then, hot glue the pin back to create your felt pin.
back to top
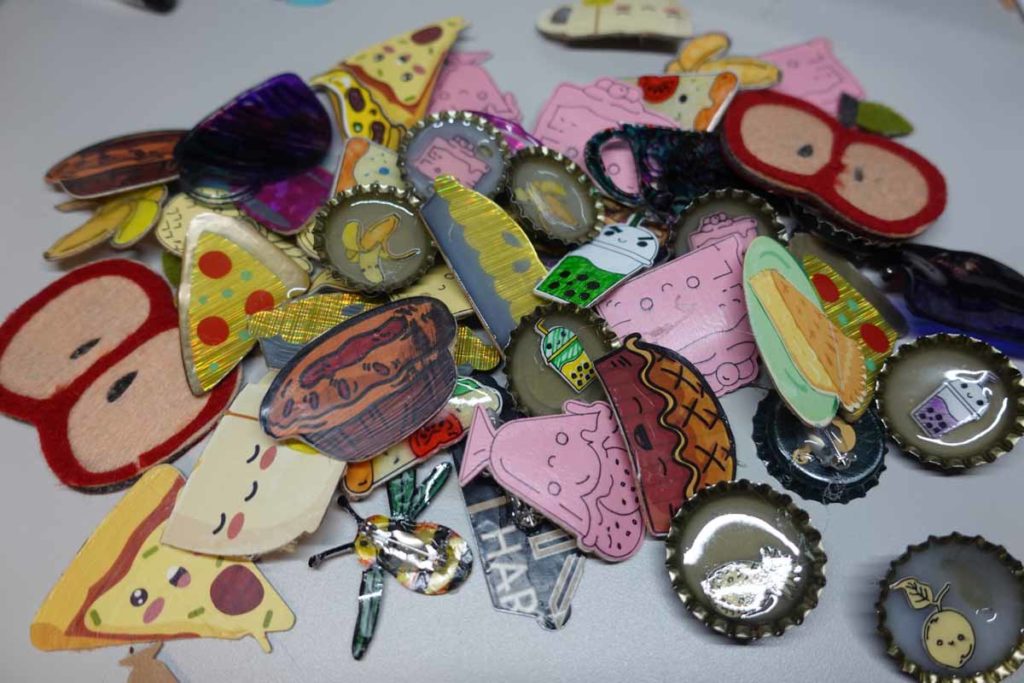
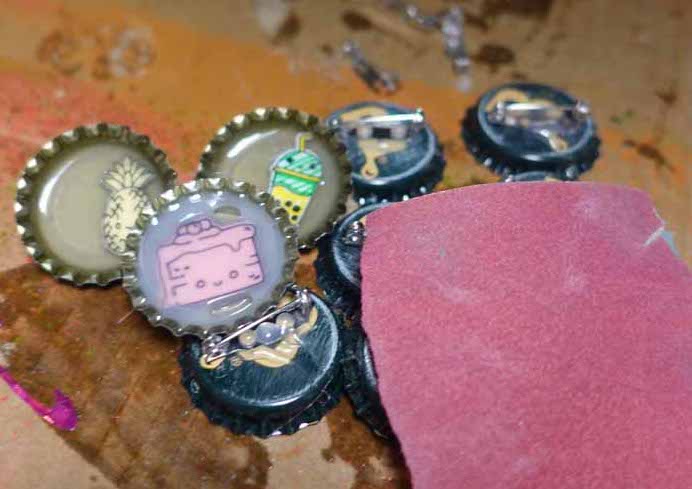
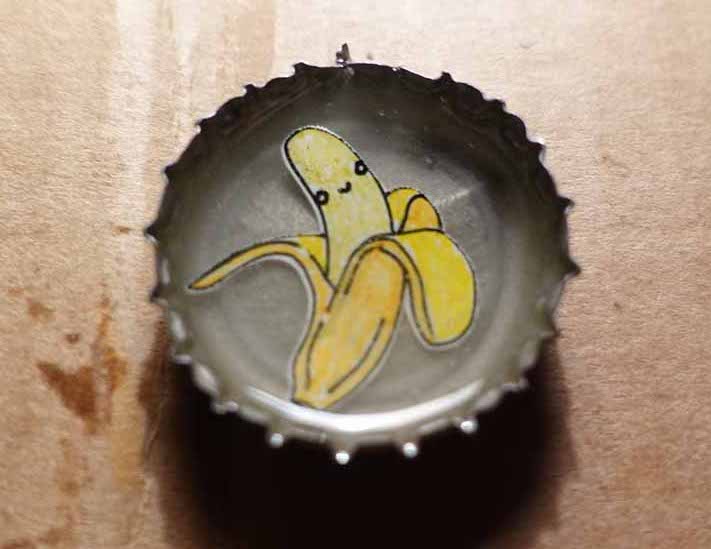
Bottle cap pins
Are you a beer or pop drinker that doesn’t quite know what to do with all those bottle caps? Make them into a pin!
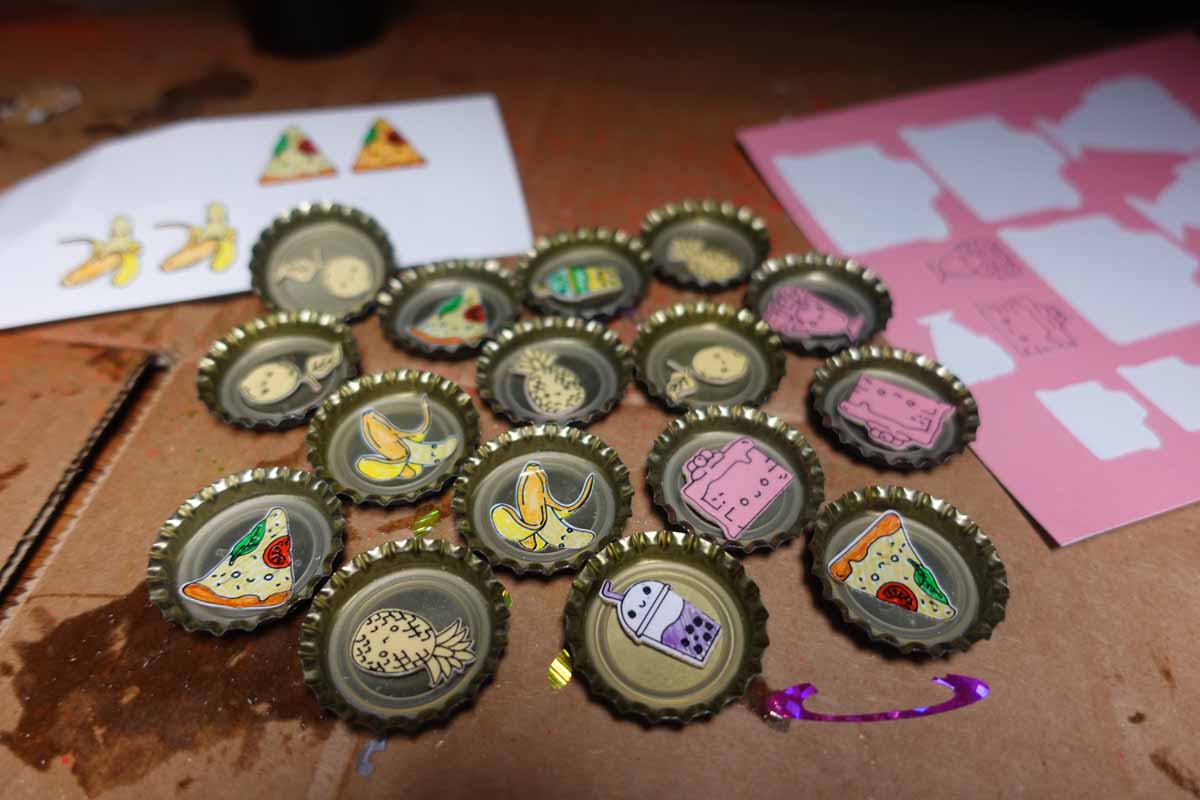
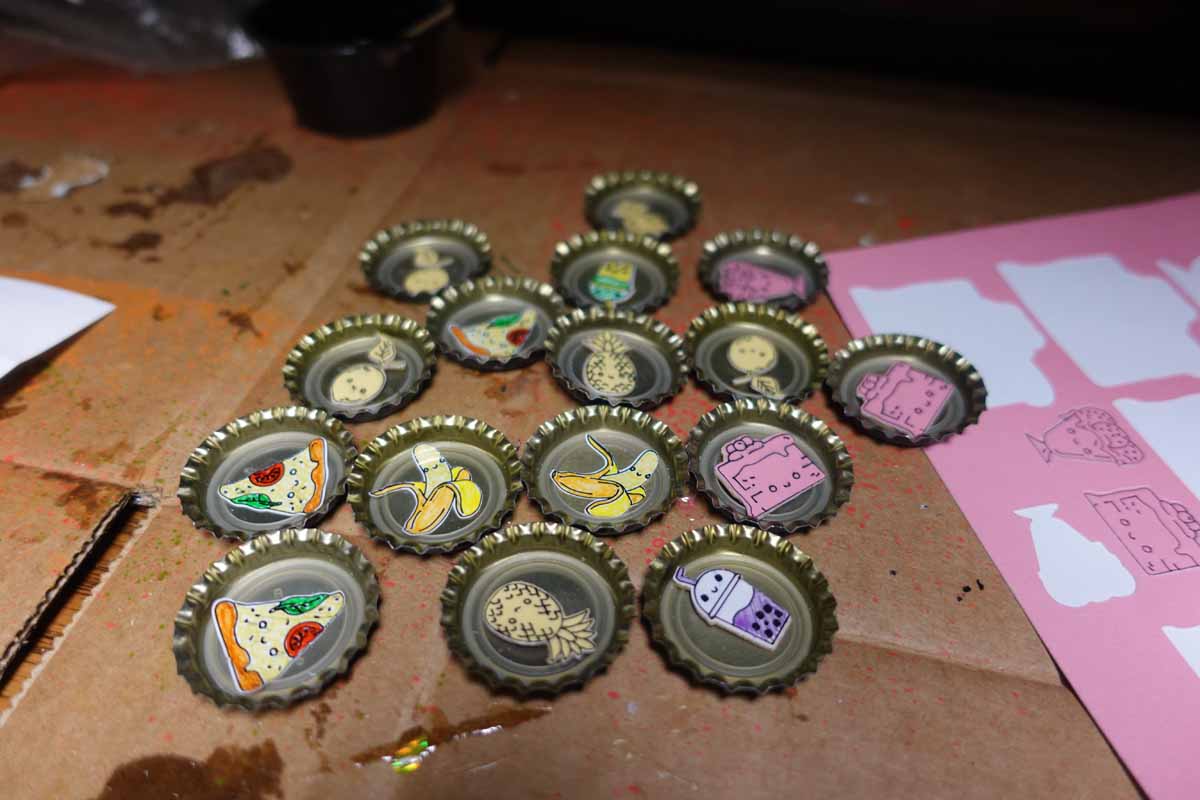
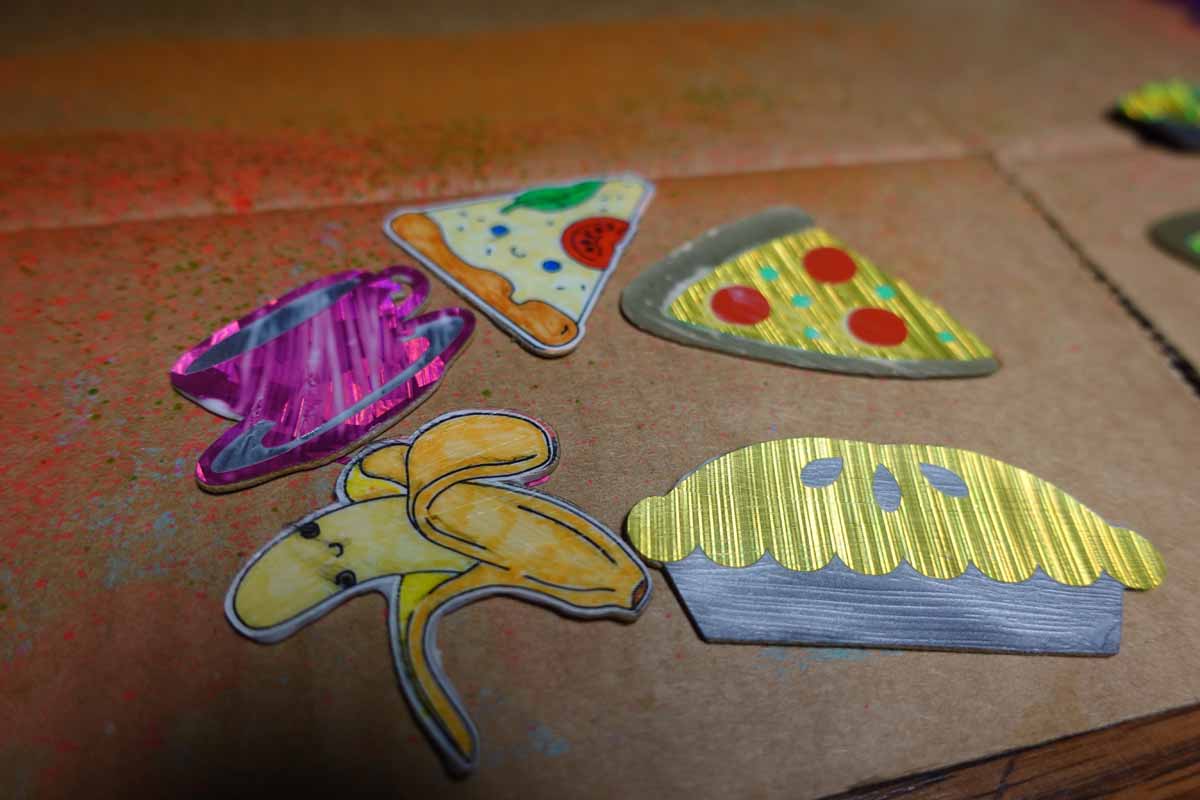
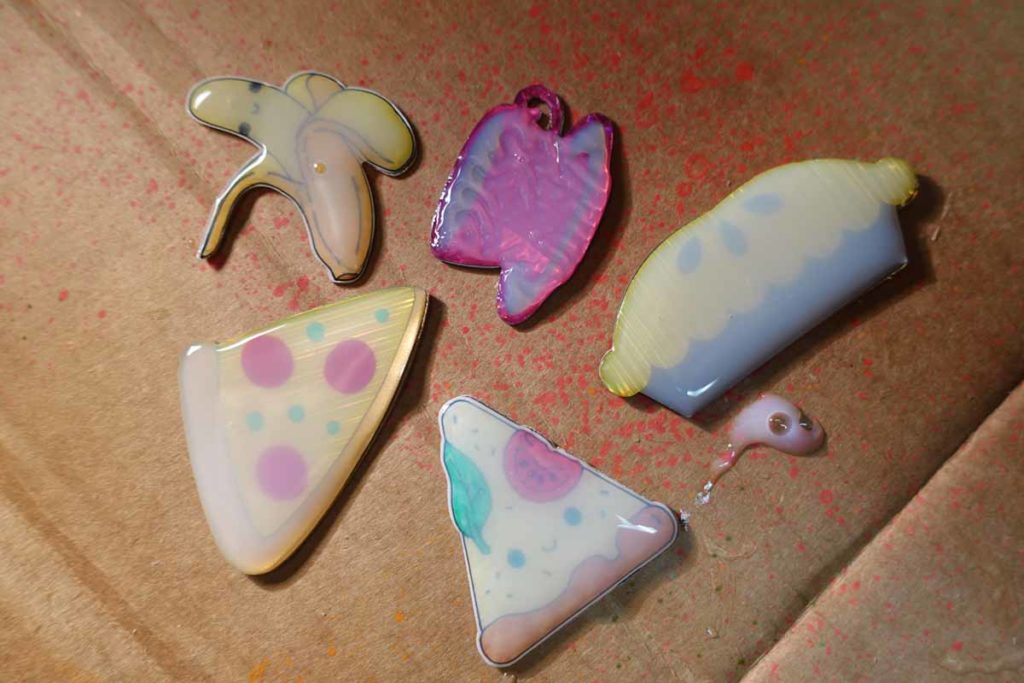
Bottle cap pins can utilize any of the above methods. No need to adhere it to a backer, either! Use resin (my preferred method, adding a little glow in the dark powder) or polymer compound (such as Mod Podge’s Dimensional Magic) to seal it into the cap.
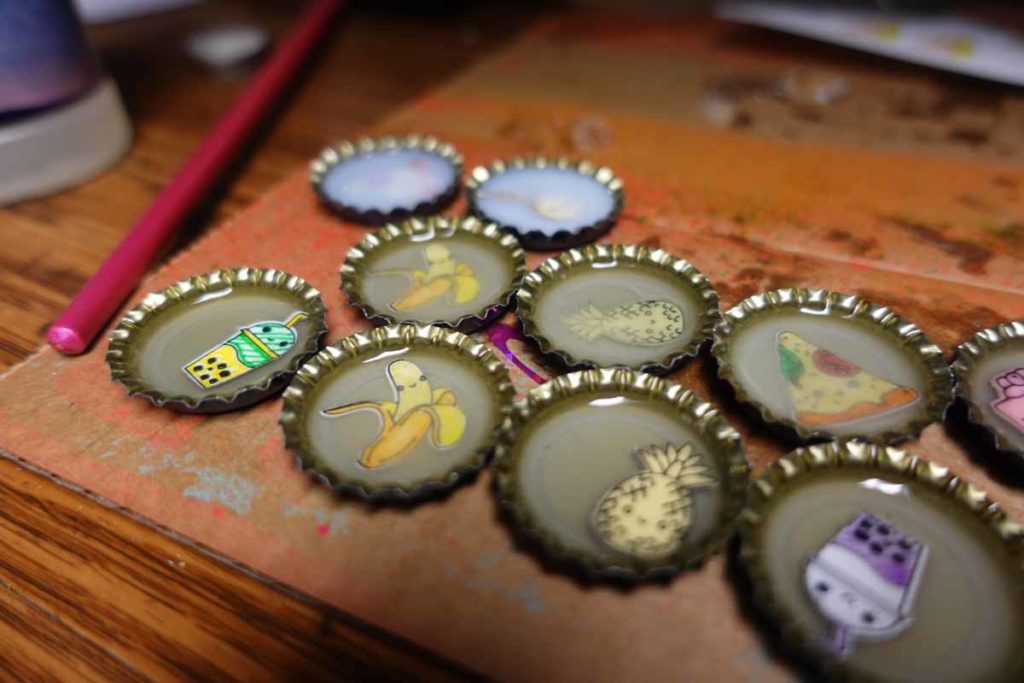
Polymer compound may start cloudy. And, the resin tends to be clearer from my experience this time around. See the photo above.
Now, bottle caps are fairly slick/smooth on the top side. I used sandpaper to texturize the top so that the pin back would have an easier time sticking when applied with hot glue. If you don’t sand it down, you may find that a gentle pull will take that hot glue and pin back right off.
back to top
Resin or polymer compound pins
Resin, perhaps, is my favorite look for pins. It gives it that glossy, smooth glamour. You can also also add glow in the dark powder to give it a little more pizazz. I think y’all know how much I like glow in the dark things, eh?
You can apply resin to any of the above methods without needing a sealant. Make sure to follow the instructions from the resin of your choice! Not doing so may cause your resin not to harden.
For resin pins using a mold (such as a silicone mold or a bottle cap, even!) – simple stick the #cricutmade image into the mold, add resin and wait for it to harden. Attach a pin back with hot glue. If the surface is too slick/smooth, roughen it up with sandpaper first before glueing.
If you are not using a mold, I recommend attaching some sort of backer. You could using a doming tray, elevate the project onto a plastic ramekin or other similar object, or (if you’re lazy like me) set it on work surface suitable for messes. Use a toothpick to guide the resin onto the surface of the project. Surface tension will help prevent the resin from rolling off the sides. Carefully use a heat gun to get rid of bubbles, if necessary. Then. let it harden, seal the back (the same way using resin or, with decoupage, as I did), and add the pin back with hot glue.
Polymer compounds can be applied the same way as pins. Though, they may require less prep work (you typically don’t need to mix anything together as you need to with resin). See the below photo for before it dried.
And, here’s a photo below that compares resin and polymer after they have hardened. Can you guess which is which?
back to top
Hopefully this quick guide helps you in your making, but I’d love for you to share your pains and gains throughout the process. I’ll start!
Helpful tips when making pins

- Gather all your supplies before beginning to sit down and make
- Have a work surface that covers your entire area, perhaps a cardboard box
- Take your time to add polymer or resin
- Beware that shrink film intensifies colors
- Use white shrink film if you prefer the pin back not to show on the back
- Make sure to follow the resin directions so that the resin hardens correctly
- Get all your friends (and/or family) in on the fun – it goes by so much quicker
Related Making


Search How-To
I want to make...