Engrave custom charms and dog tags with Cricut Maker
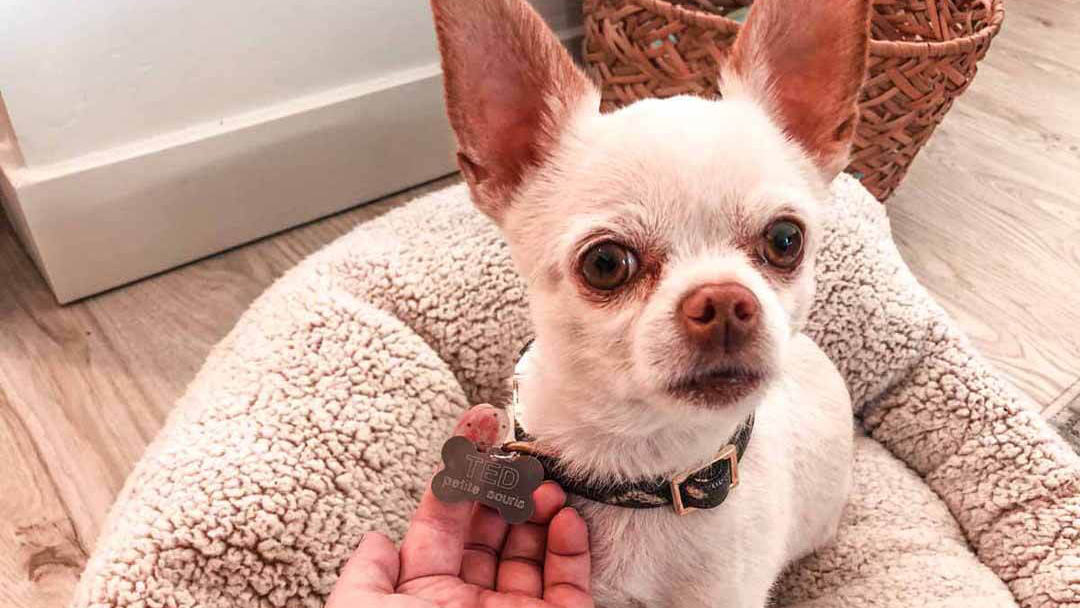
Hello, my name is Claire and I am obsessed with my dog Ted.
Sweet Mr. Ted is a Chihuahua/Terrier mix that weighs a whopping 8 pounds and just turned 9-years old. He attends all of my virtual meetings while we have been working from home at Cricut® and has become known as “The Intern.” He is half cat and loves nothing more than chewing on a toy shaped like a mouse. So, the nickname my husband and I have given him is petite souris (or “little mouse” in French), because we’re classy like that.

This little furball brings me almost as much joy as whipping out my Cricut Maker®! So, I jumped at the chance to combine these two loves together and create matching charms for Ted and myself. I’ll walk you through how to engrave dog tags and create adorable Shrinky Dink charms with Cricut Maker. Well, let’s get started!
Engraving custom charms and dog tags
What you’ll need:
- Cricut Maker
- Engraving Tip
- StrongGrip Mat
- Cricut Fine Point Pens
- Shrinky Dink paper
- Parchment paper
- Painter’s tape (or masking tape)
- Aluminum dog tags
- Jump rings and pliers (for jewelry making)
- Chain charm bracelet
Step 1: Creating Shrinky Dink Charms
First, create your Shrinky Dink charms in Design Space®. You can customize my community project here.

To make simple charms…
- Select a base shape for your charm. I chose a heart, but you could easily change this to a star, circle, square, or triangle.
- Make your base shape ~3x bigger than the size you want the finished charm to be because Shrinky Dink material… shrinks.
- Add a small circle to your base charm shape to represent the hole punch you’ll need for attaching a jump ring later.
- Select both the base shape and the small circle to “SLICE” the two images and create the hole punch cut out.
- Next, add draw images to your charm.
- I chose a small mouse (image #M43AAB) for Ted.
- Select all of your layers (this includes the base shape that now has a hole punch and any draw images you’ve added) and “ATTACH” them together.
- REMEMBER TO MIRROR, especially if you are adding text!
- Now, we’re ready to make our project with Cricut Maker.
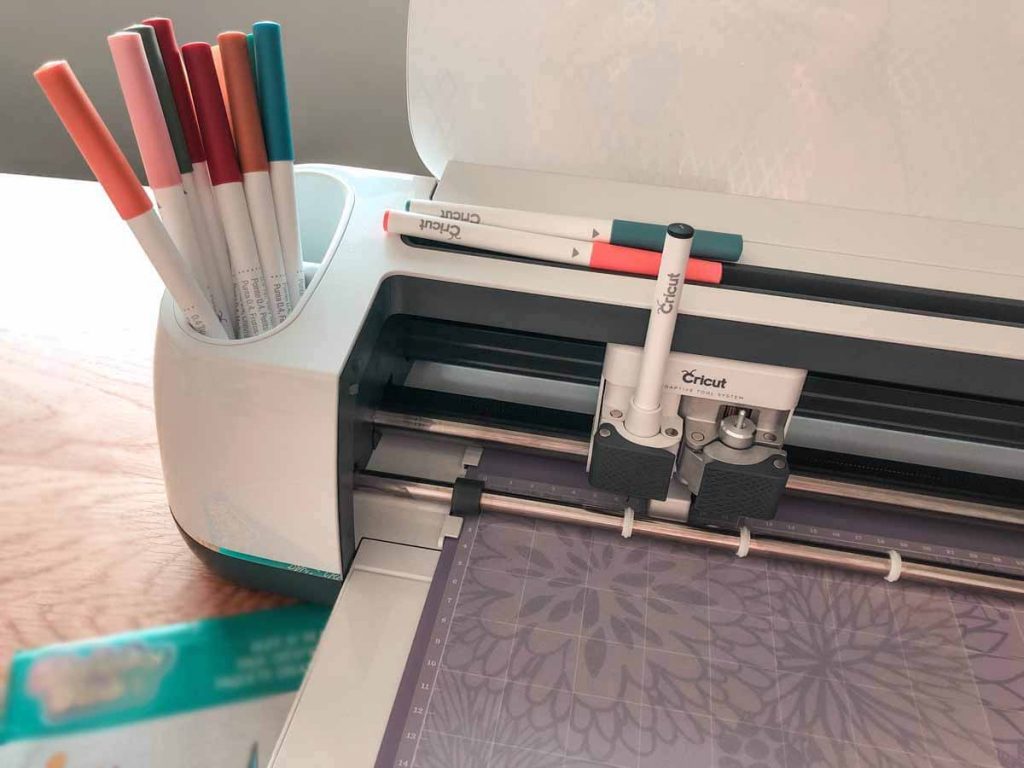
Using a StrongGrip Mat, load the Shrinky Dink paper into the machine. Make sure you have the appropriate pen loaded into your A clamp, and the blade loaded into your B clamp before beginning.
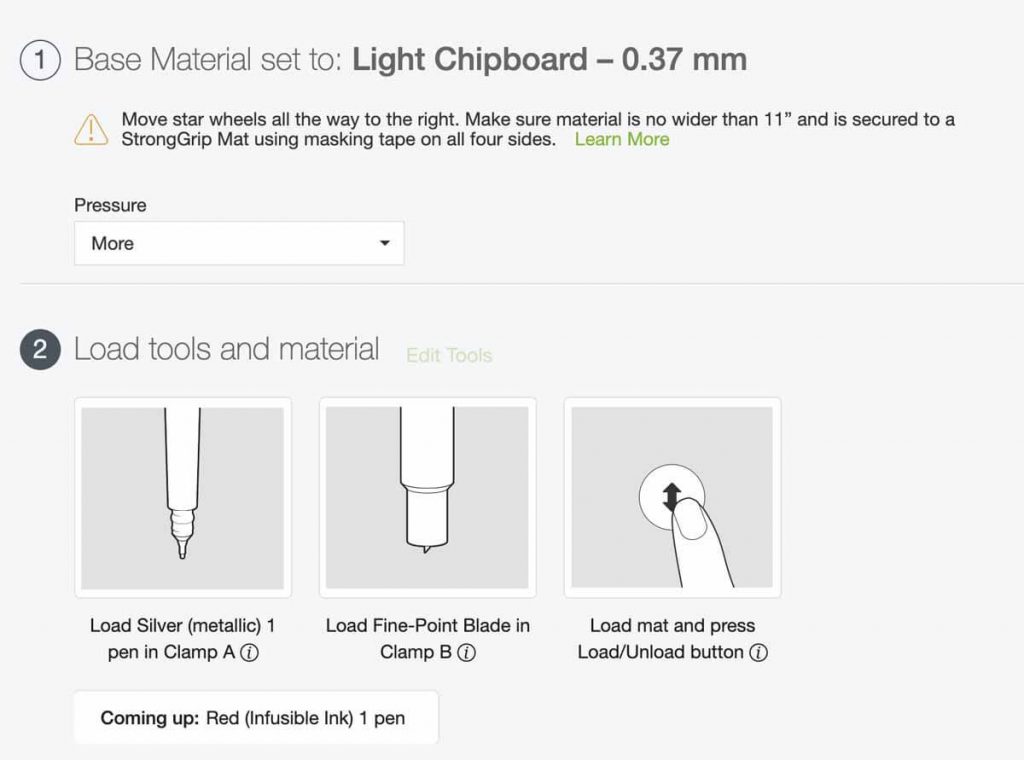
For Shrinky Dink material, I select the Light Chipboard setting as the base material and increase the pressure setting to MORE before starting. This setting allows you to use either a fine-point blade or knife blade (B clamp).
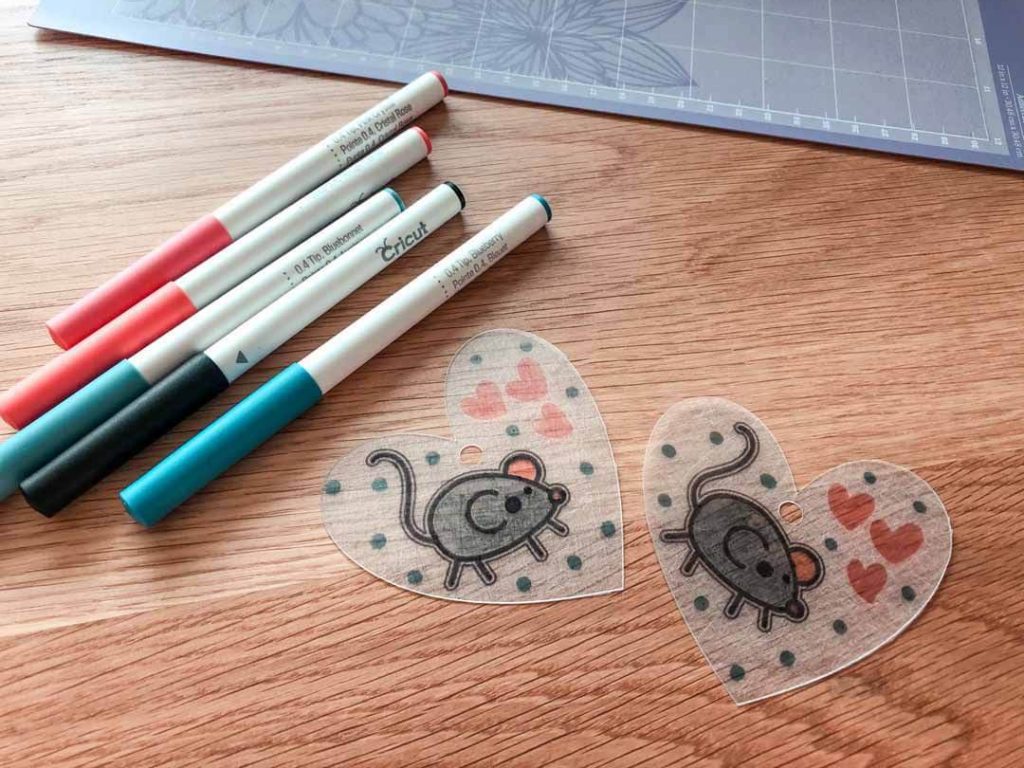
Once your charms have been drawn and cut, you can then color them in or simply ready them for the oven.
Here are my tips and tricks for using Shrinky Dinks:
- Make your charms about 3x bigger than the size you want them when cutting them out on your Cricut Maker. They shrink significantly in the end.
- Preheat your oven to 325°F and line a baking sheet with parchment paper. DO NOT use wax paper…I sadly made this mistake.
- Bake your Shrinky Dinks for 3 minutes and watch them become a small, plastic charm!
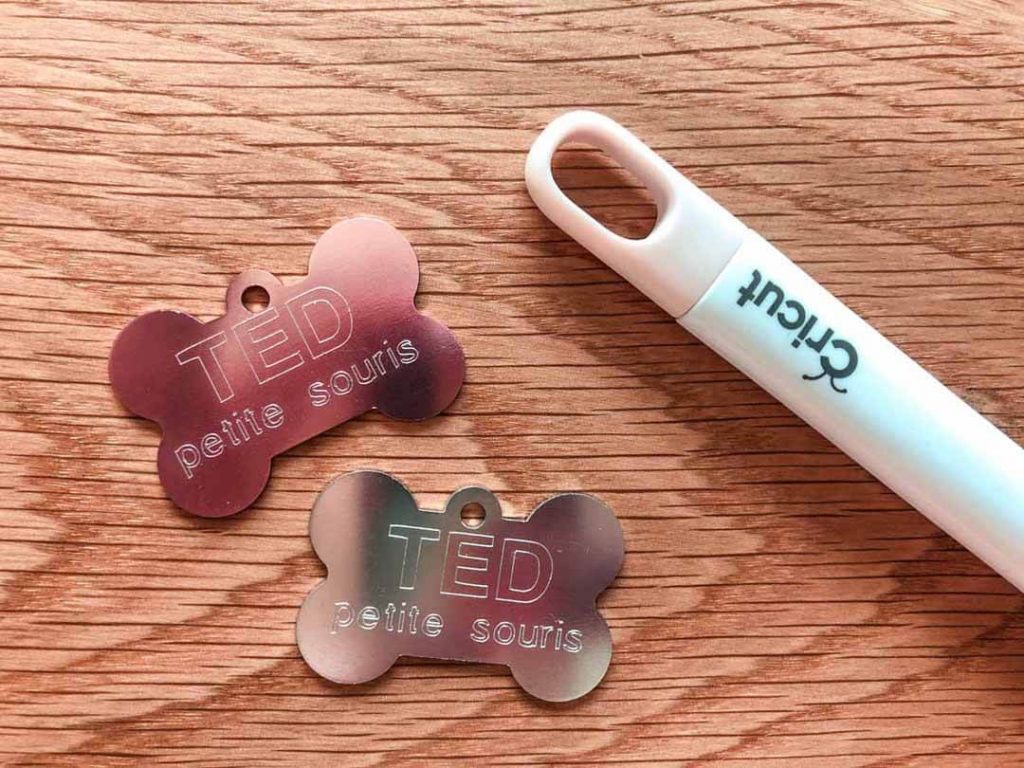
Step 2: Engraving Dog Tags
Grab the aluminum dog tags, painter’s tape (or masking tape), StrongGrip Mat, and Engraving Tip for this project.
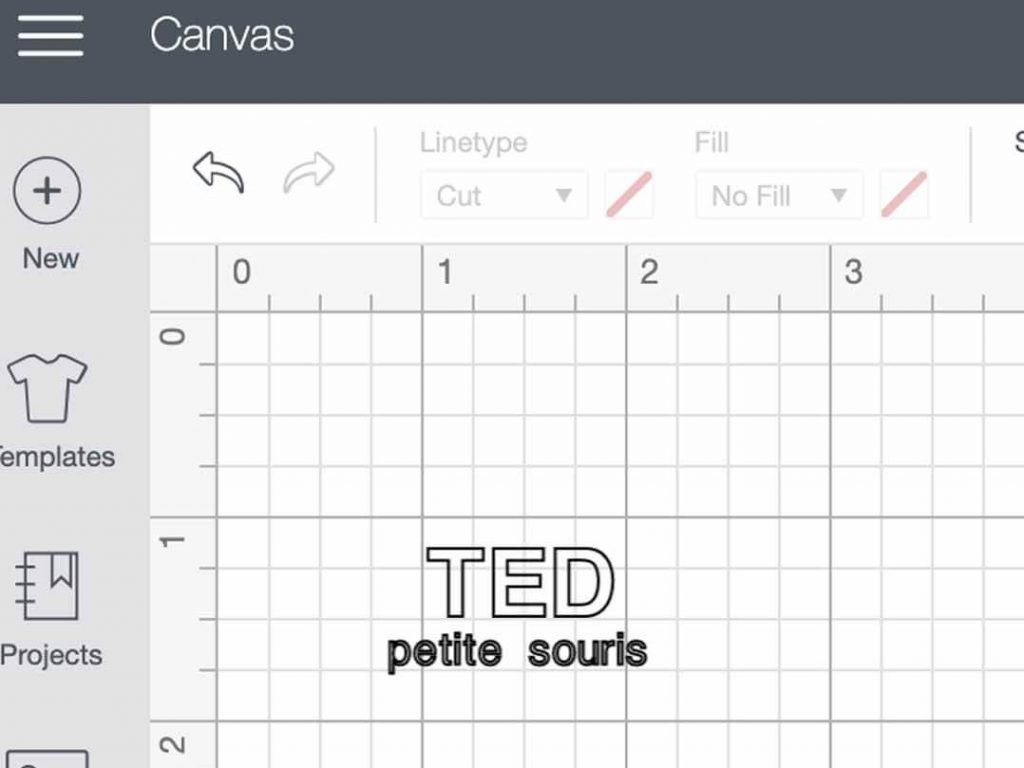
In Design Space, try to create a design where the size of your font aligns with the grid on your Mat. There may be an even better way to do this, but I just eyeballed it…and it worked! Be sure you change your text from CUT to ENGRAVE linetype.
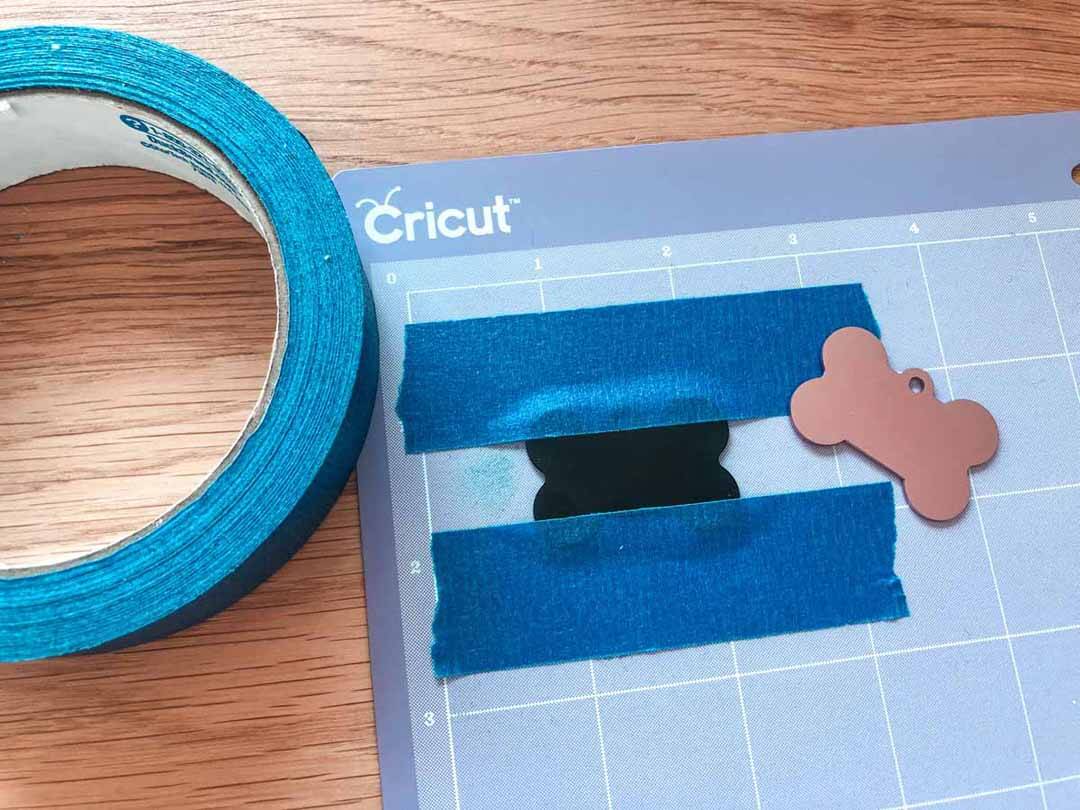
After you have aligned your aluminum dog tag to the grid on your Mat to mimic where your text is located in Design Space, use painter’s tape or masking tape to secure it.
Don’t forget to load the Engraving Tip into the B clamp before beginning.
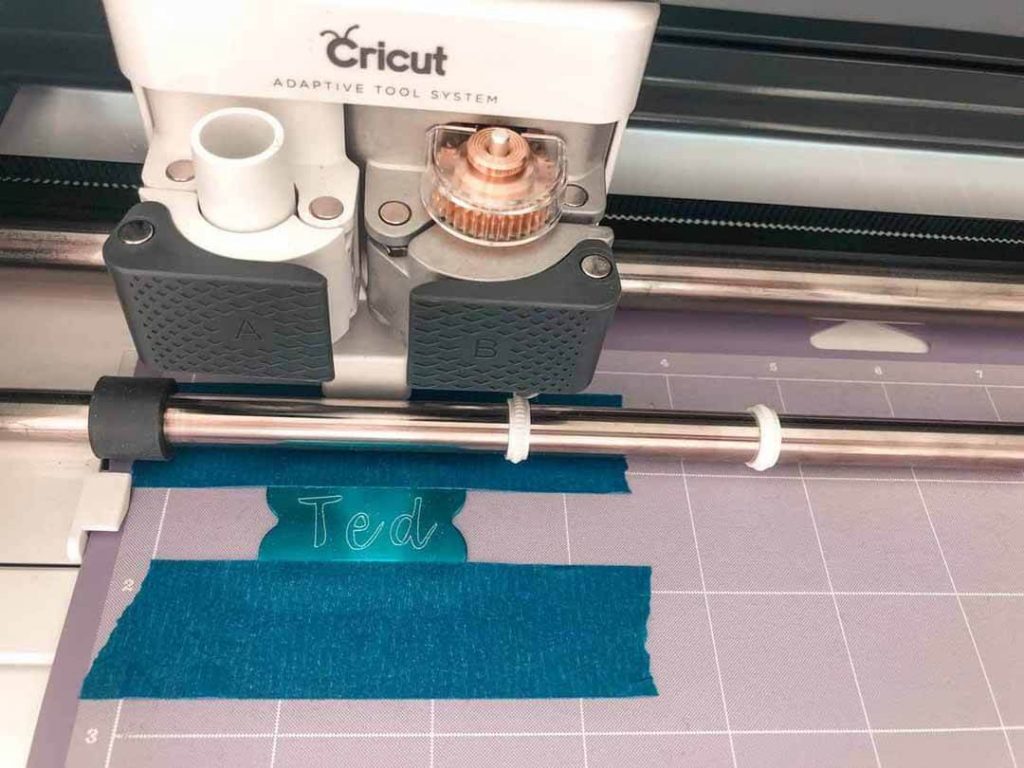
Your Engraving Tip will effortlessly carve your dog tag to reveal your beautiful design. This was my very first engraving attempt and I was IN LOVE with the result.
Voila! Two perfectly engraved dog tags for Ted and myself!
Step 3: Creating a Charm Bracelet
Now that your charms have been drawn, cut, and engraved, you’re ready to create a personalized charm bracelet to the likes of which you have never been seen before!
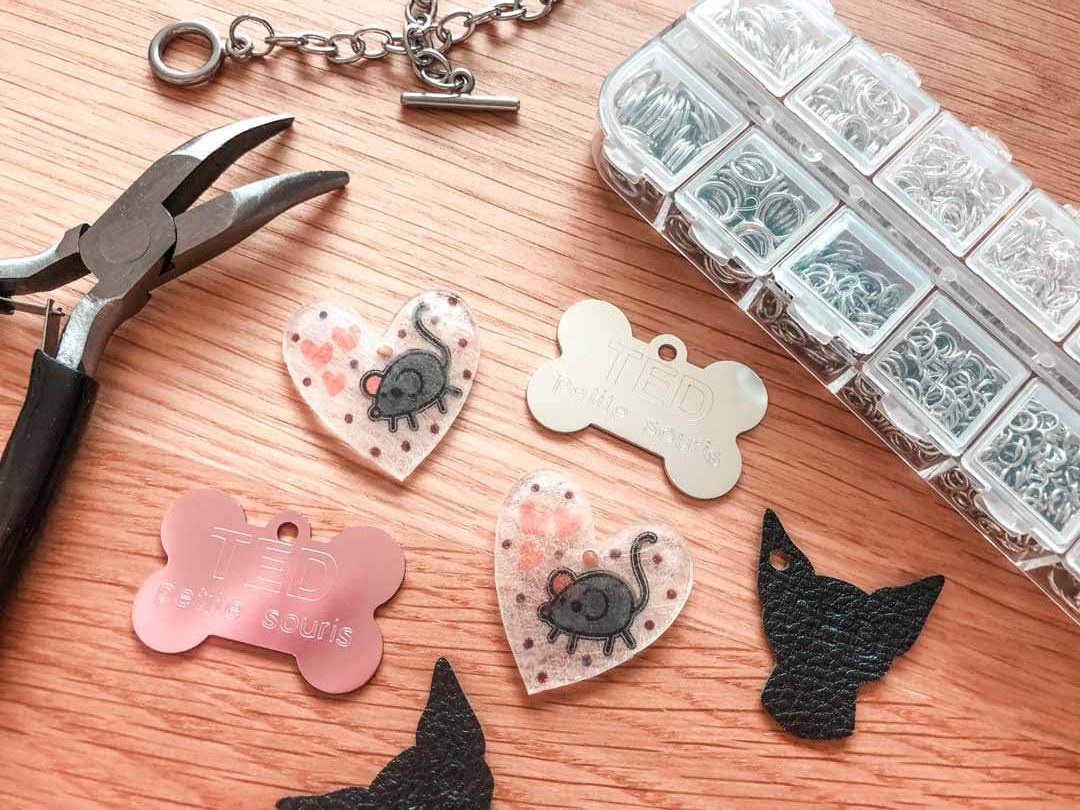
Grab your charm bracelet, jump rings, and pliers. As you can see, I even used my Cricut Maker to cut out small Chihuahua-shaped leather charms to complete my bracelet.
Simply grab a handful of medium sized jump rings and use your pliers to attach them to each hole punch located on your Cricut charms. Before closing the jump ring, attach the charms to your charm bracelet and/or pet’s collar.

Now, I’ll be honest, this turned out to be quite the chunky charm bracelet and I have since moved it onto my key ring. But, no matter where I am, I always have a little reminder of Ted. And, even though he doesn’t realize it, he’ll always have a little reminder of me slung around his neck!
This blog post is dedicated to Ted Godzilla Daley, the best-est boy in the whole world! I can’t wait to see the custom charms and tags you’ve created for your pet. Please share them in the comments below or tag us @OfficialCricut.
Related Making


Search How-To
I want to make...