Decorate your dorm room with 3 trendy pastel prints
Excited to move in for her final year of undergrad, student and blogger Chloe Miller shows us how to craft stunning dorm room decor with Cricut!
Next time someone asks me what year I am in at school, I might cry. I can’t believe I’m going into my senior year of college! I know so many of us feel like our college experiences have already flashed before our eyes; I relate after only having a full freshman year, a shortened sophomore year, and a junior year spent at home due to the pandemic.
I know it’s such a cliche, but I remember my first day of school as if it happened a week ago. Every year I always get so excited for the back-to-school season – it’s always an amazing time, especially for someone who loves color coding her books and school materials. I especially love picking out clothes for the first day!
This fall, I’m finally returning to campus after a year and a half hiatus. I am overjoyed to reunite with my friends, move into my sorority house, and not attend another Zoom lecture. I’ve always been into DIY dorm room decor and making my dorm room feel comfortable and inviting — just like home. This is especially important, considering I traveled across the country from the east coast to go to school in LA.
However, this year it is more important than ever for my dorm room to be iconic. I mean, it is my last year at school…and also my last first day of school, maybe ever! Brb, crying.
Because I’ve been so excited about moving back to campus, I have spent countless hours pinning my inspiration for what I want my dorm room to look like for my senior year. The vision is pastels, florals, Danish-inspired art, with hints of some of my favorite things like coffee, girly vibes, and Harry Styles. When I got my Cricut Explore 3, I knew I had to make some fun wall art to hang either above my bed or my desk on move-in day.
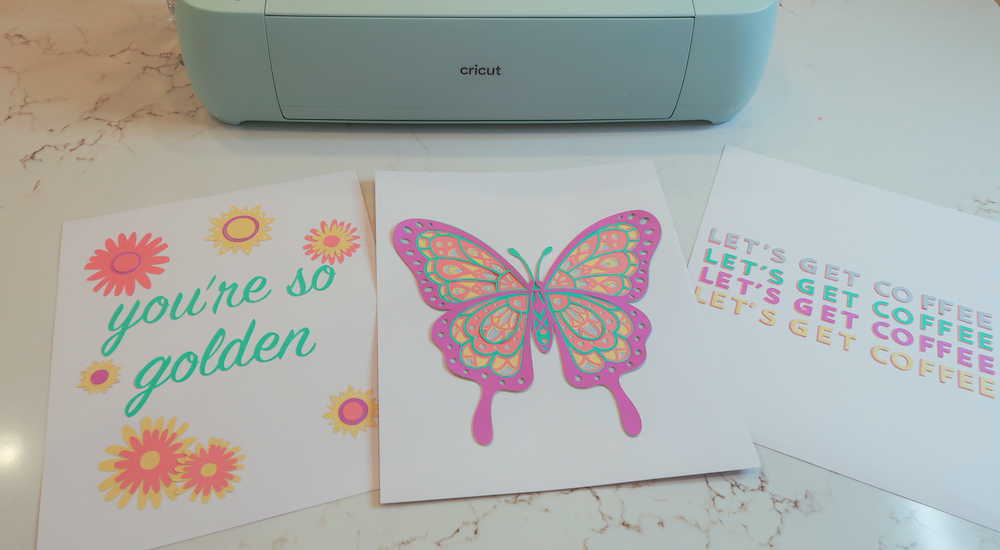
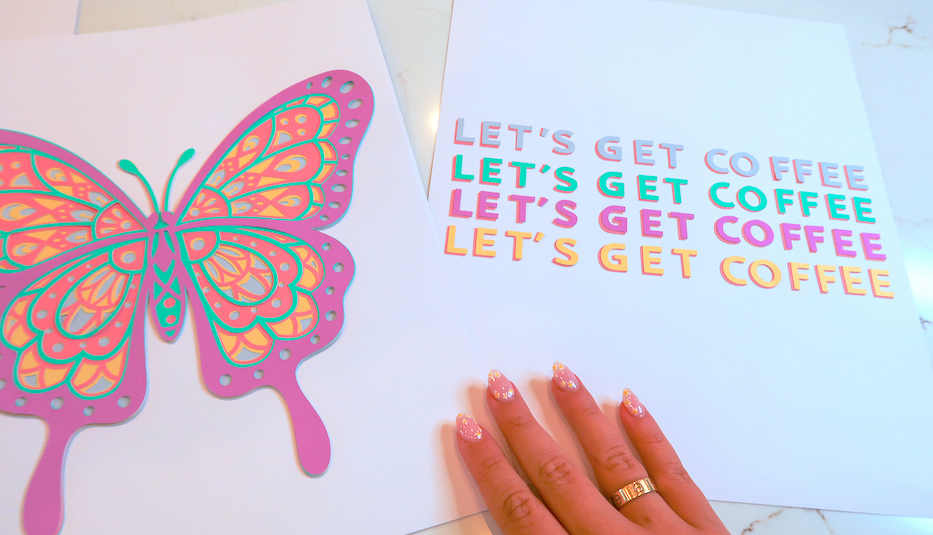
This project was so fun to make! From the creative freedom in Cricut Design Space (I am not an artist, but this software makes me feel like one) to the application onto the cardstock, the entire process was super simple. I made three designs for wall art, “Let’s Get Coffee,” “Butterfly,” and “You’re So Golden” (inspired by the Harry Styles song “Golden,” of course). Let’s get started!
Supplies/tools you will need (same materials for all the cuts we’re making):
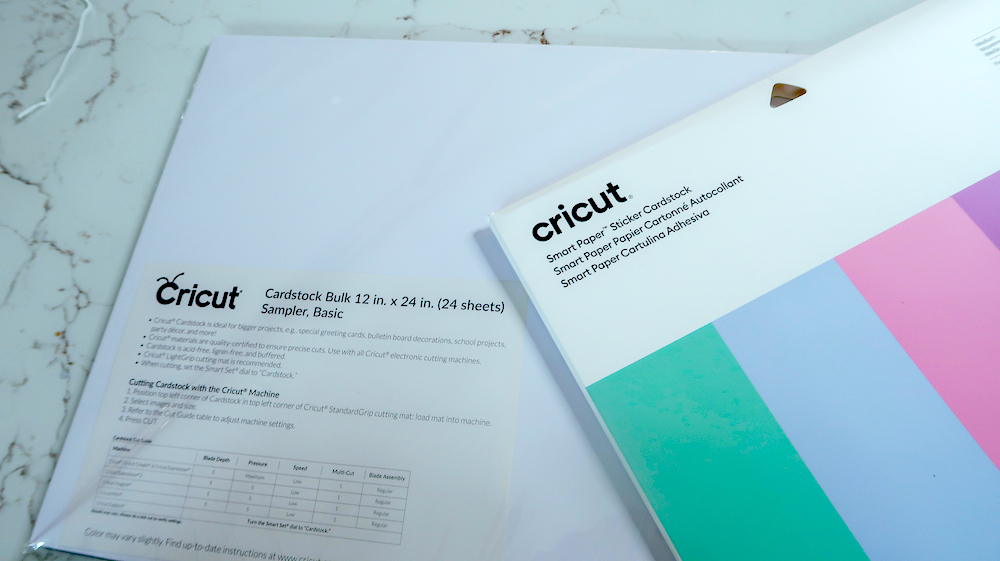
- Cricut Smart Paper Sticker Cardstock, Pastel Sampler
- Cricut Paper Cardstock, White
- Cricut Acrylic Ruler
- Paper cutter for cardstock or Cricut scissors
- Frame, if desired (I’m waiting to get frames until closer to move in day!)
Before you begin
Decide how large you want your cuts. The cardstock I used for the base of the cut (Cardstock Sampler, Basics) comes in a 12” x 24” size. I didn’t want to have to look around for a custom frame in an uncommon size, so I cut my base cardstock to a 10” x 12” size since I know that is a standard frame dimension. Also, with multiple frames next to one another, 10’’ x 12’’ would be an aesthetically pleasing size given the limited dorm room wall space.
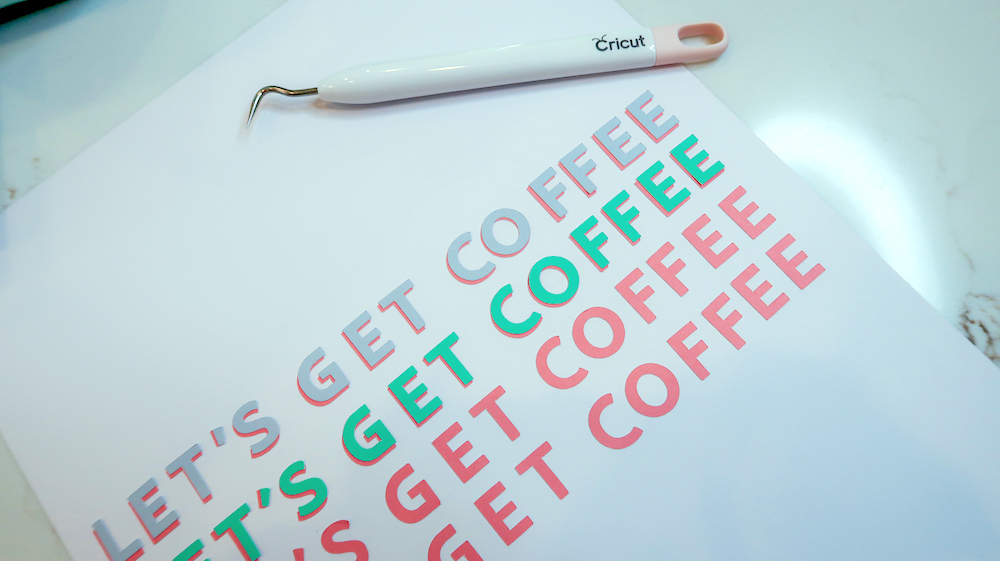
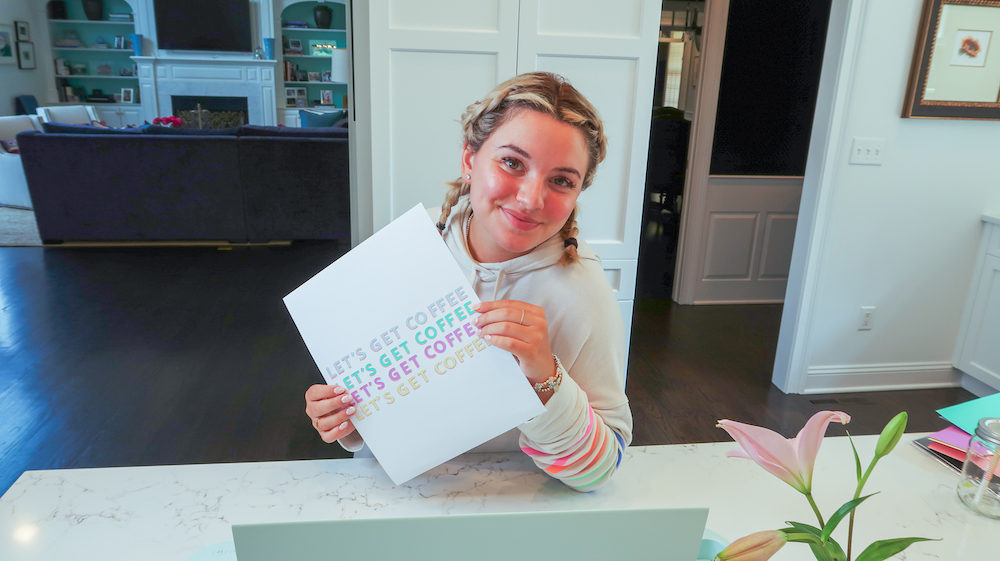
Let’s start with the “Let’s Get Coffee” cut
I created a blank project and only used the text feature on Design Space. I typed out what I wanted my design to say, and then I chose a font that was fun and would layer well with two colors. I ended up going with “That’s the Ticket Sans” font and used pink as the base color for all 4 lines of text.
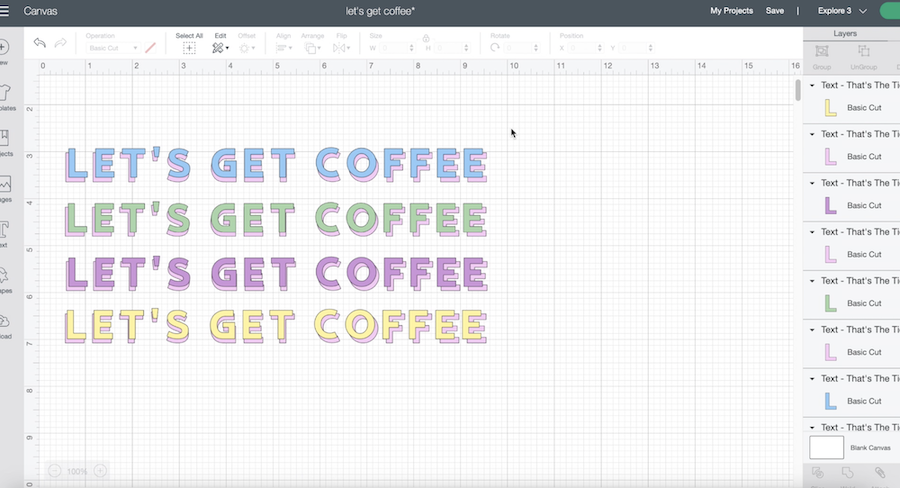
Then, I made four more of those exact lines of text and layered those on top but a smidge to the right and up for a bubble/layered effect. I changed each top layer color to a different pastel color so the lines would be pink and blue, pink and green, pink and purple, and pink and yellow.
Make sure your text is properly sized to fit the size of canvas you want for your cut. Since I am planning to display my cut in a 10” x 12” frame, I made the design a little smaller to allow for some white space around the text. It ended up being around 9.5” x 8” when I sized it down before cutting.
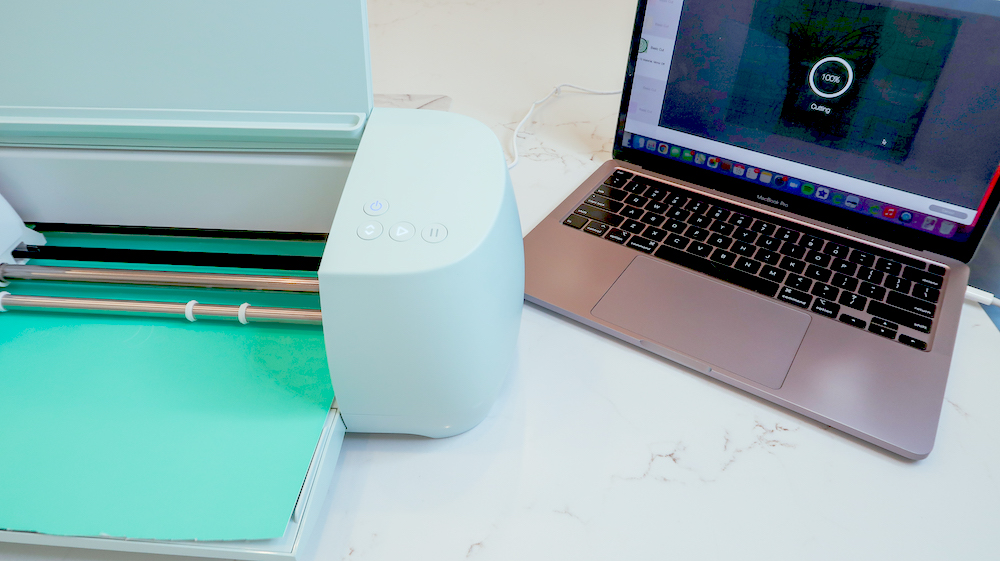
When you’re happy with the look of your design, click “Make It.” Load your Sticker Cardstock into your Cricut machine and it will then begin to cut each layer of text by color. You do have to weed the negative space within your letters and apply the stickers by hand, though if you’re creating a vinyl design you should be able to use transfer tape instead. I created mine with cardstock for that three-dimensional impact and texture, but feel free to customize your design with different colors and materials.
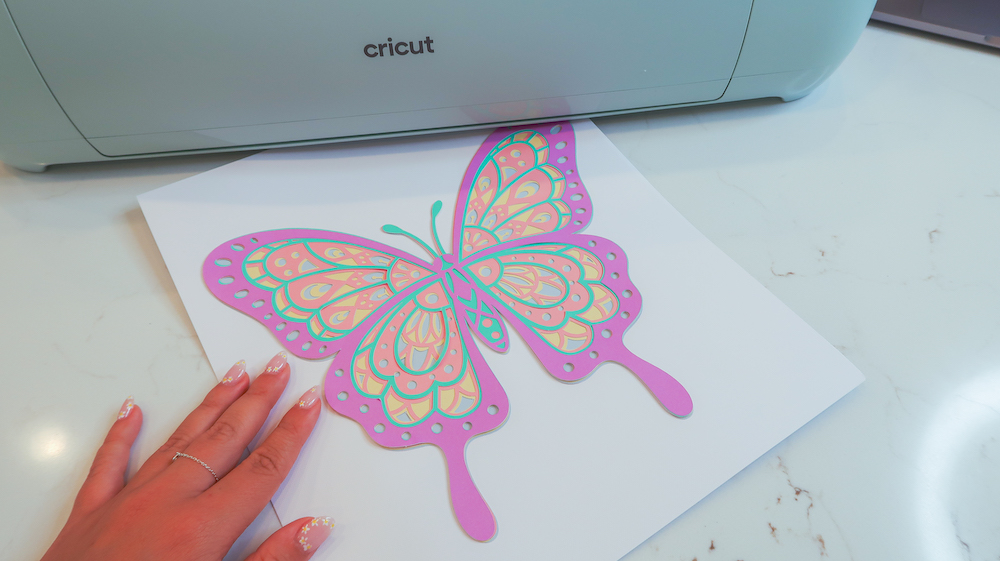
Now let’s move on to the butterfly
This design is STUNNING but I can’t take credit for it — it’s one of the trending designs in Design Space (and clearly for good reason).
The process for creating the butterfly is much of the same. Open the Projects tab and search for the “Layered Butterfly Wall Art” project in Design Space.
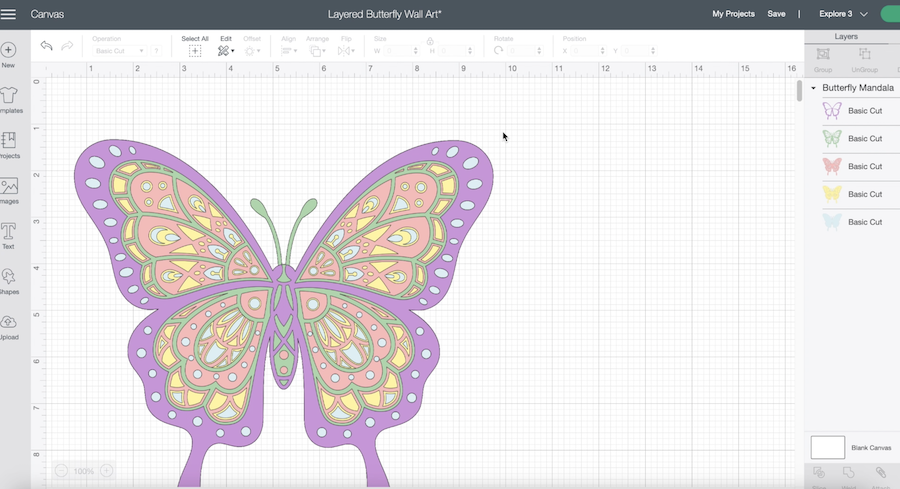
The design on your computer or phone will show a blue square around the butterfly for this project, but I clicked on that square and deleted it. Once you’ve established the butterfly is scaled properly to your canvas and frame, everything is good to go!
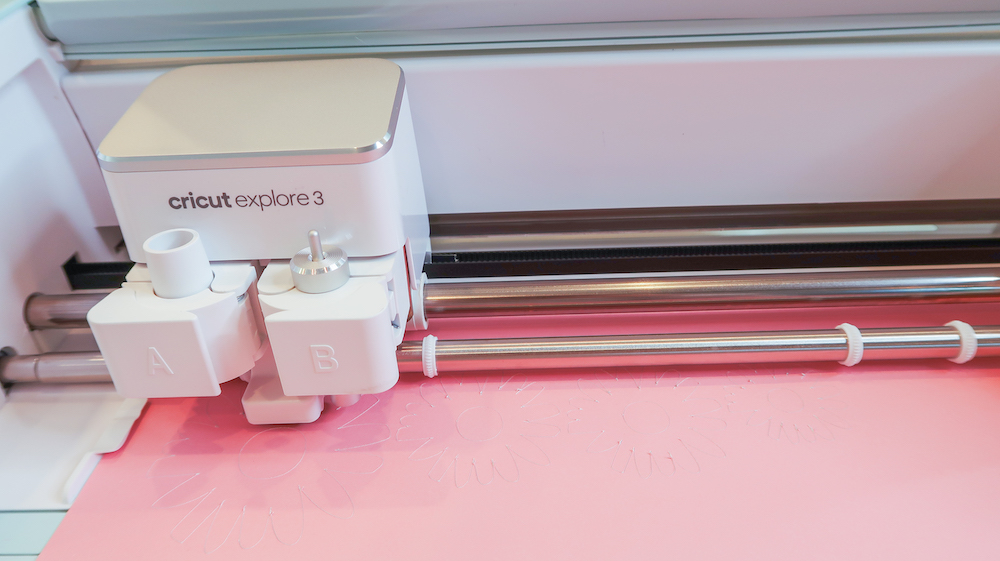
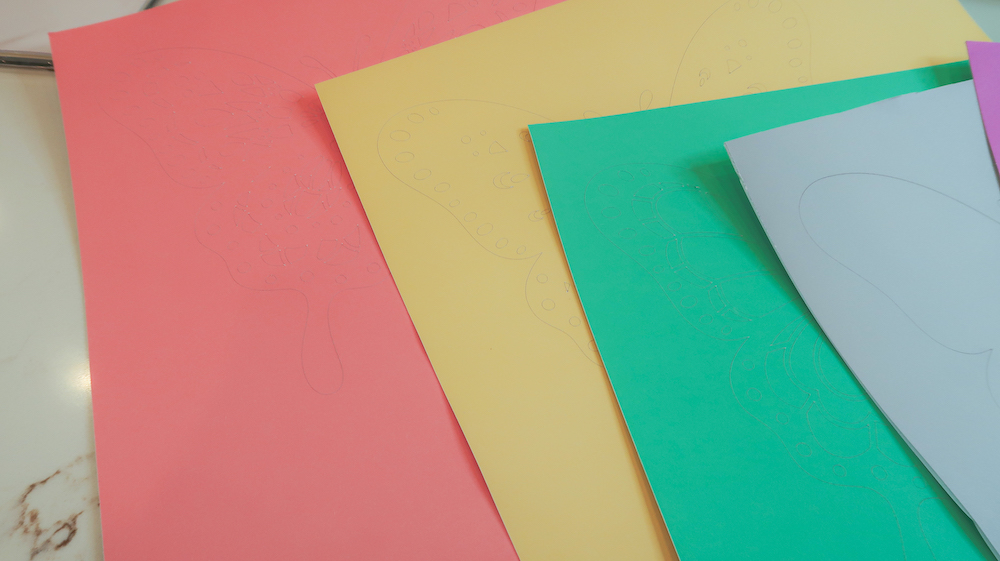
Press “Make It,” then follow the loading instructions (as with our coffee design from earlier) and watch your Cricut machine cut the various colored layers of the butterfly from cardstock.
You’ll then peel your design from the rest of the cardstock, weed any negative space, and apply the butterfly design to your canvas layer by layer. I ordered mine blue, yellow, pink, green, and then purple, but you can customize the colors of cardstock to suit your design preferences. Feel free to also add text or other embellishments around the butterfly– I liked the simplicity of this design as is, especially because it’s going to be in between two cuts with text.
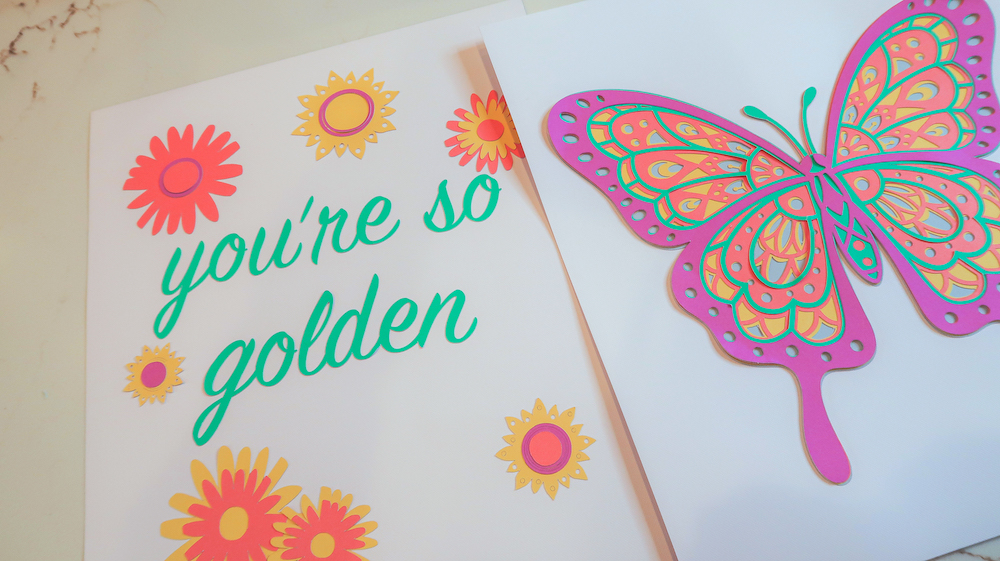
The last cut in this project is the “You’re So Golden” design
I made this design from a blank project and added my text in the font “SignPainter” to the center. I blocked off a 9.5” x 10” area on the Design Space canvas to make sure I’d have extra room for white space and the frame. I then sized my text to fit a 6.2” x 4.4” space. I then added fun shapes and imagery around the text for a retro and girly vibe.
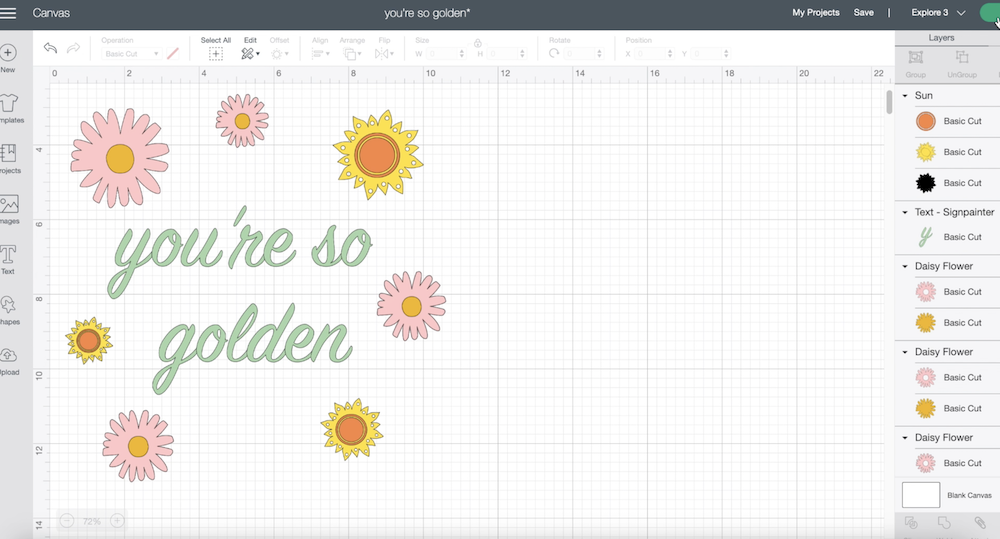
I used the “Daisy Flower” image (#M262AAA7D) and a sun image (#M40B38). I played around with colors and sizes until I found the design I wanted, then followed the same cutting process as before and applied it.
Now, you can go get frames for these pieces and display them in a horizontal row, diagonally, or vertically on any wall — they are so cute! Of course, you don’t have to follow the exact words or shapes that I used for my project and you can follow the same steps with your own designs. I can’t wait to get frames for my wall art and make my room come to life with ease.
I feel even more excited about displaying these in my room given that I made them and accomplished something I was unsure I’d be able to do! Again, I am not an artist and was really nervous about how I was going to do this, or how I would mess up the cuts. The great thing is that the Cricut Explore 3 makes it so easy by telling you exactly what to do and what materials to use, helping us all along the way.
My confidence in crafting has skyrocketed after this project, and I know I will be so proud of myself every time I look at my wall. And hey, it’s fun to brag to others too when they complement your wall art!
For additional inspiration for your dorm room and apartment art projects, be sure to check out Cricut’s tips for organic modern decor, non-permanent home decorating, and other trending design themes.
Related Making


Search How-To
I want to make...