Create DIY vinyl window silhouettes for Halloween
A hurricane blew through Utah several weeks ago and it uprooted thousands of trees throughout the area.
Okay. Fine. Not a hurricane. A windstorm with gusts suitable to hurricane force created hundreds of thousands of dollars worth of damage last month. My friend, Christi, was a victim to that damage, but she took those windblown lemons and made them into lemonade!
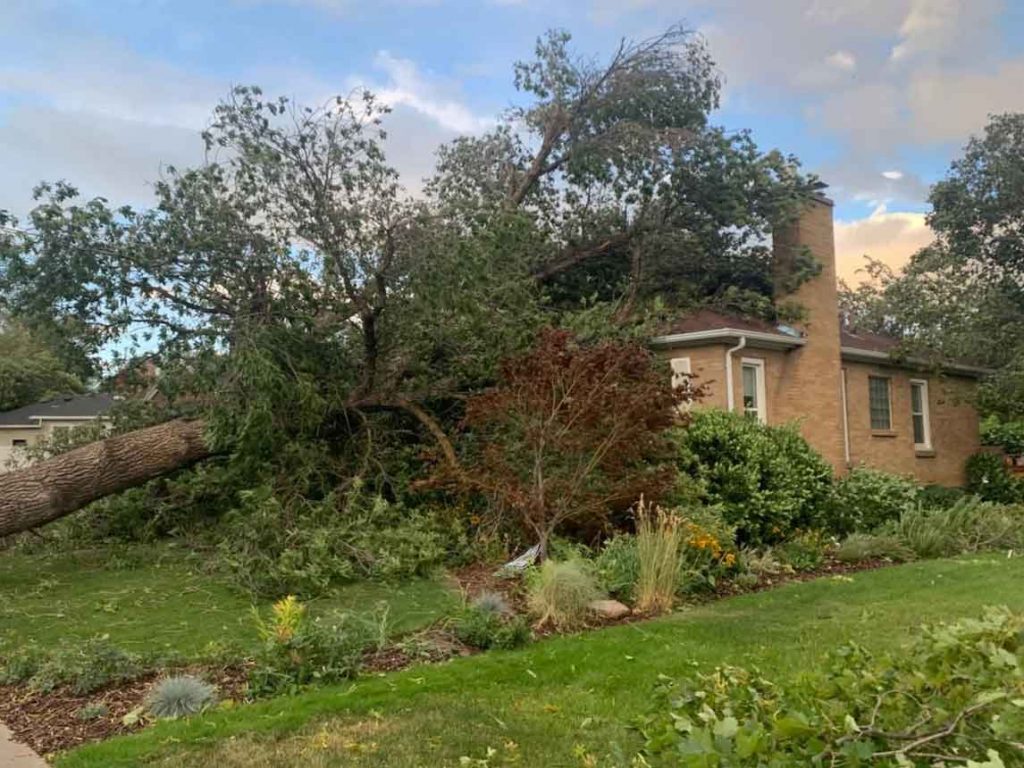
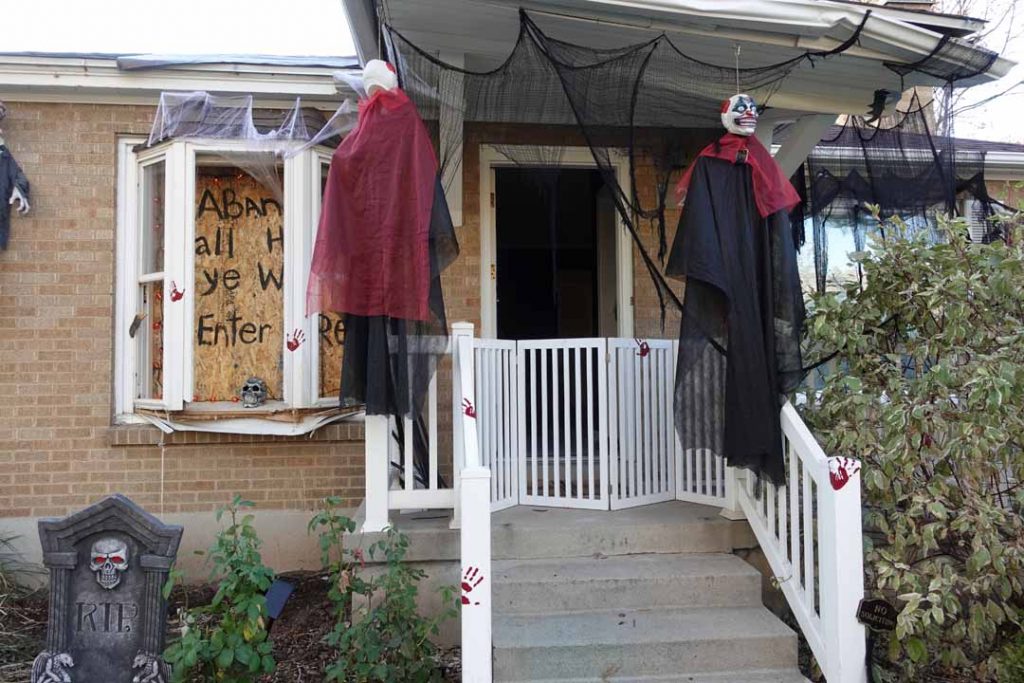
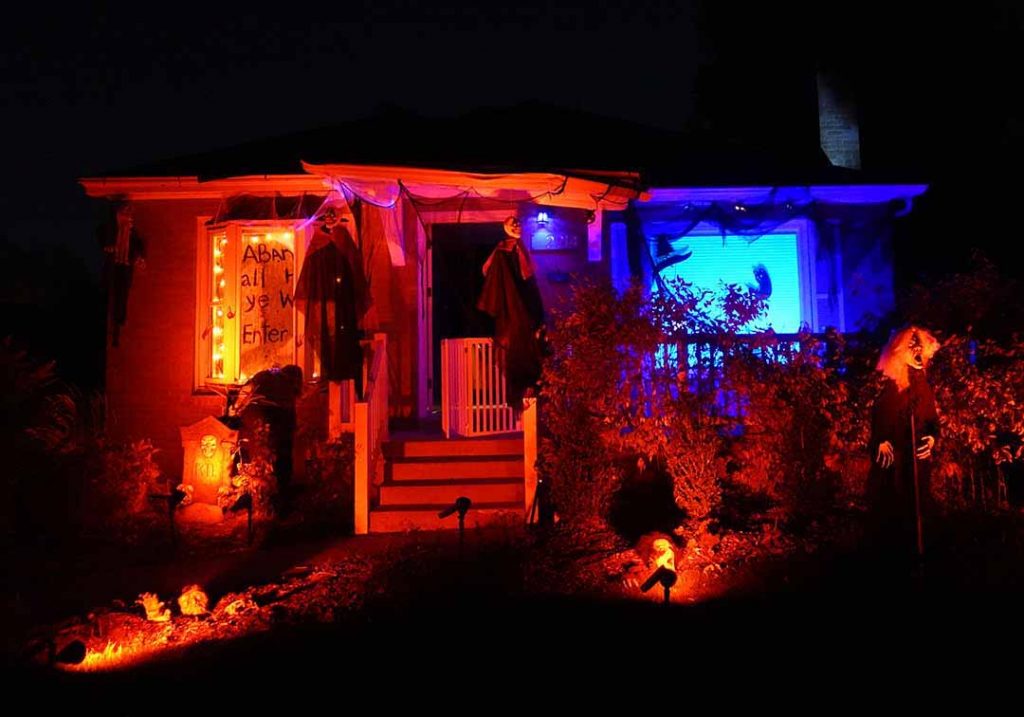
The 75-year-old ash tree that fell on Christi’s house during the storm completely crushed the front of her house. The bay window was destroyed; the awning atop the front door became decrepit; the Japanese maple tree looked like it survived a massacre; and the house suited the set of a horror film. So, essentially, it was perfect for Halloween!
About two weeks ago, before October even started (yes, before October even started), Christi showed me all the decorations she ordered to spook-ify her home. She loves Halloween.
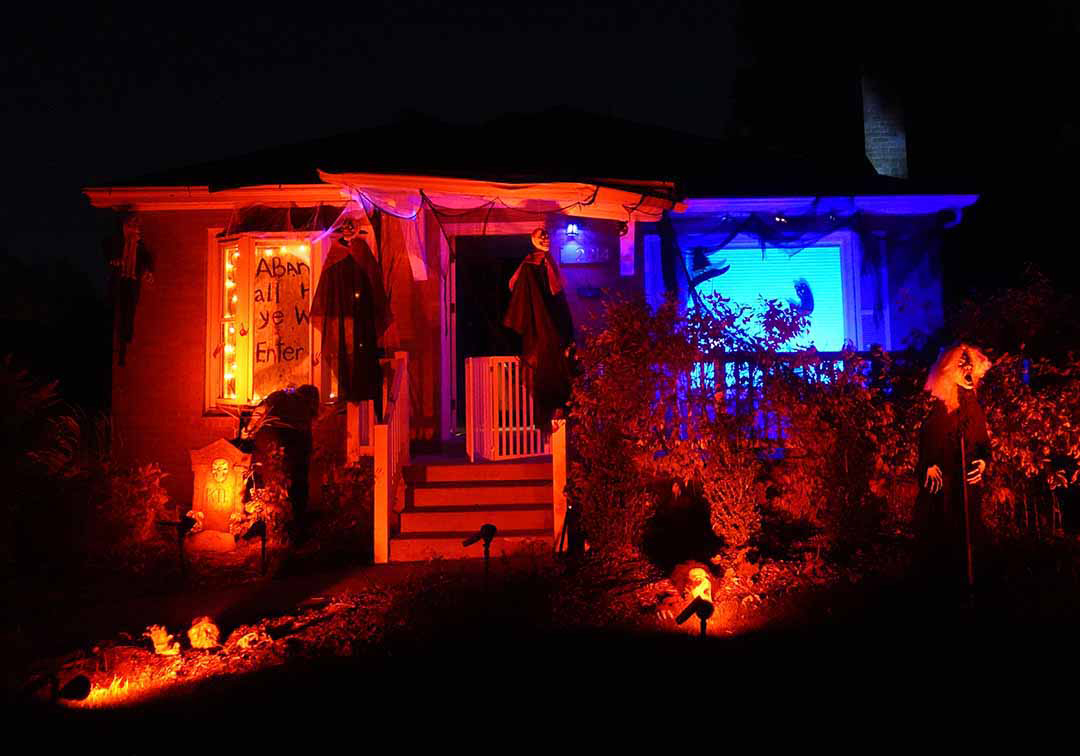
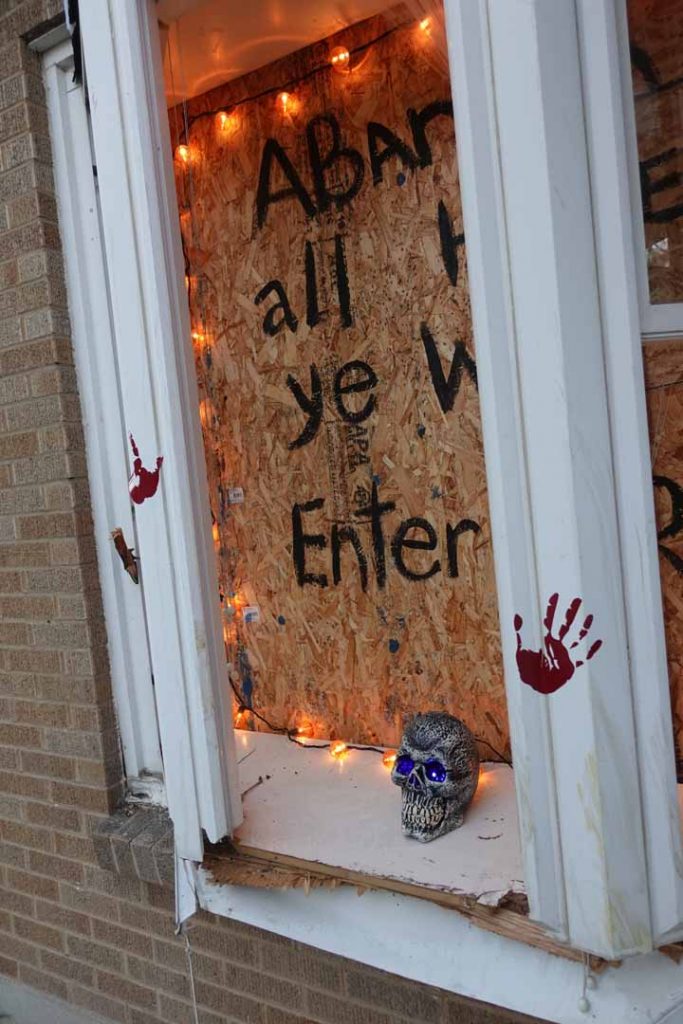
She spray-painted the boards on her bay window, adorned cobwebs to the awning, placed scary figurines throughout the lawn and garden beds, replaced the maple tree with a tombstone, projected flying ghosts onto the chimney, and set it against a soundtrack of eerie Halloween noises.
Though, there was nothing in the window!
So, I took to my Cricut Maker® and opted to create a window scene from vinyl silhouettes for her. Here’s what I did if you want to follow along…
- Designing the window
- Fitting the designs to mat size
- A few bloody handprints for embellishment
- Make it with your Cricut machine
- Add a bit of glow
- Make a scene!
What you’ll need:
- Cricut machine (I used my Cricut Maker®)
- StandardGrip machine mat, 12″ x 24″ size
- Vinyl
- Weeder tool
- Transfer tape
- Measuring tape (to measure your window or surface area)
- Glow-in-the-dark paint, optional
Designing the window
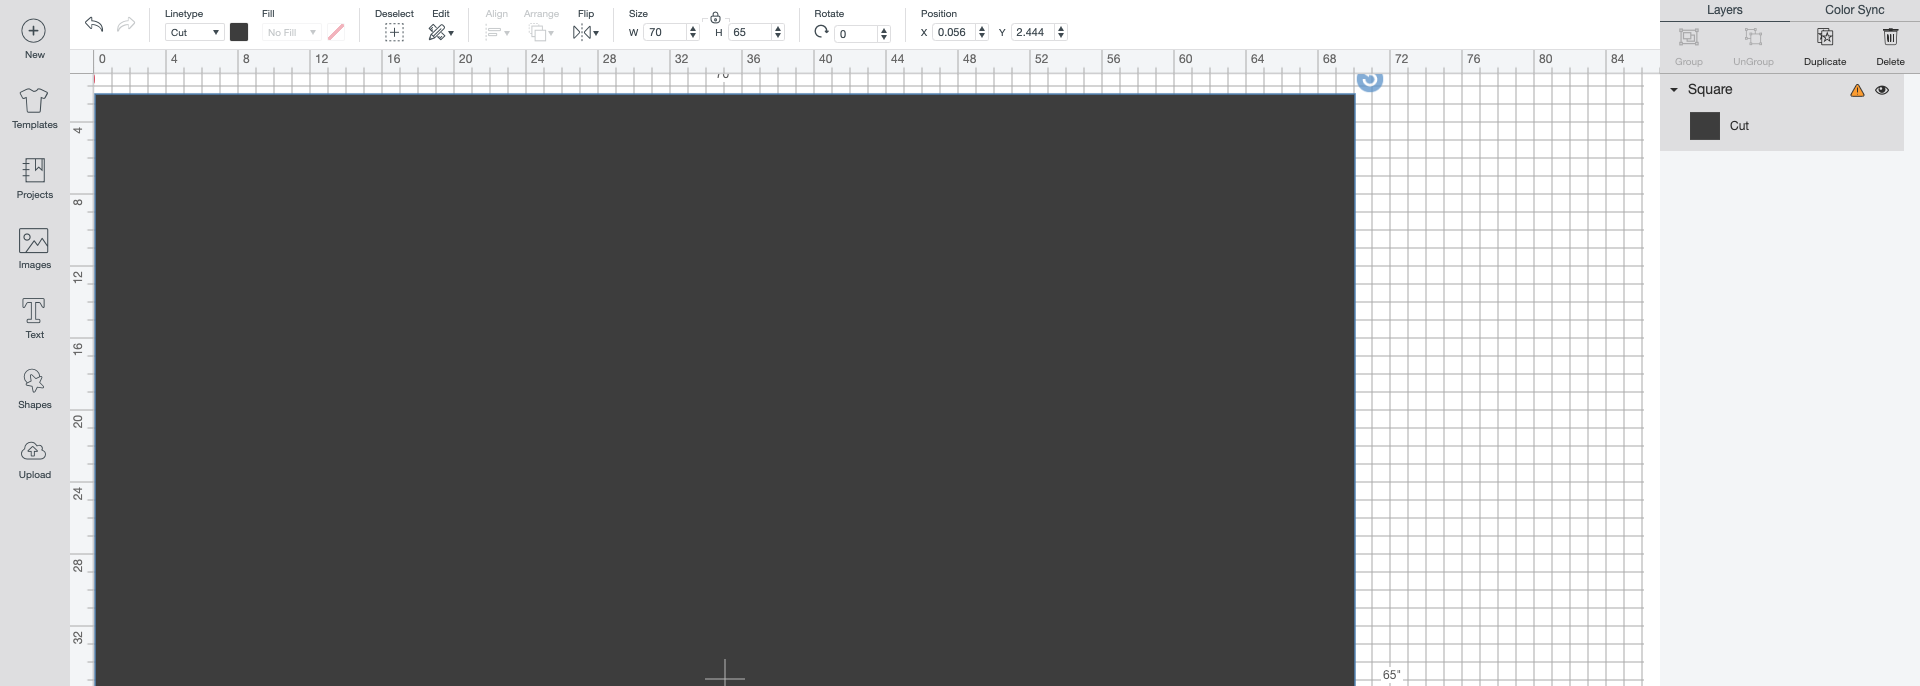
Be sure to measure the window before you start designing your window scene. Christi’s window measured 70″ W x 65″ H so I created a “square” using the “shapes” tool at the same size in Design Space® to mimic the “window” on my canvas. Click on the lock icon to change the proportions on the square and turn it into a rectangle.
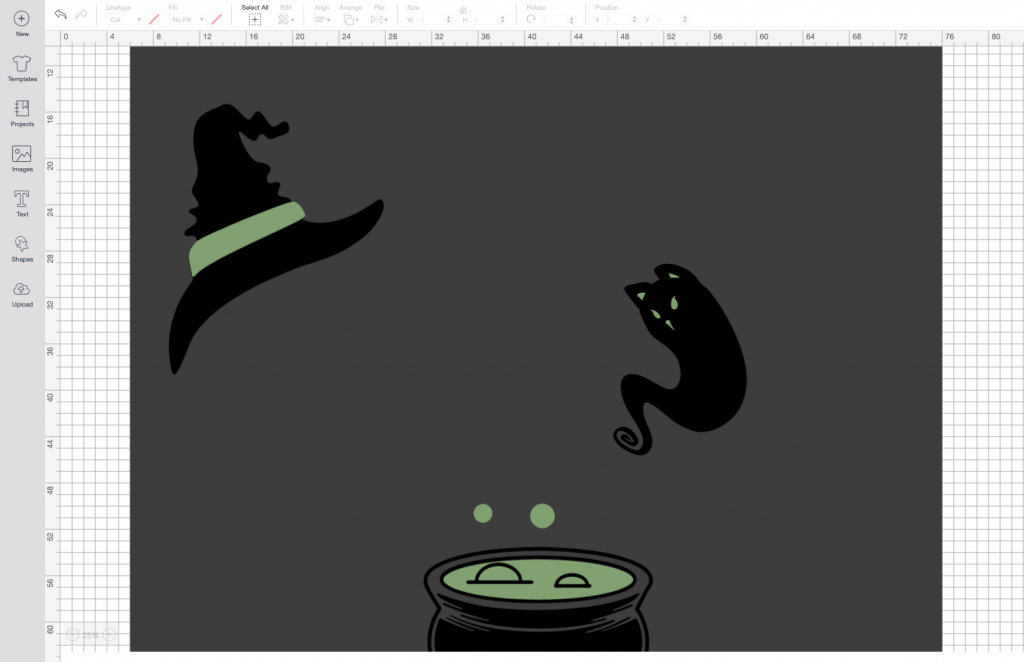
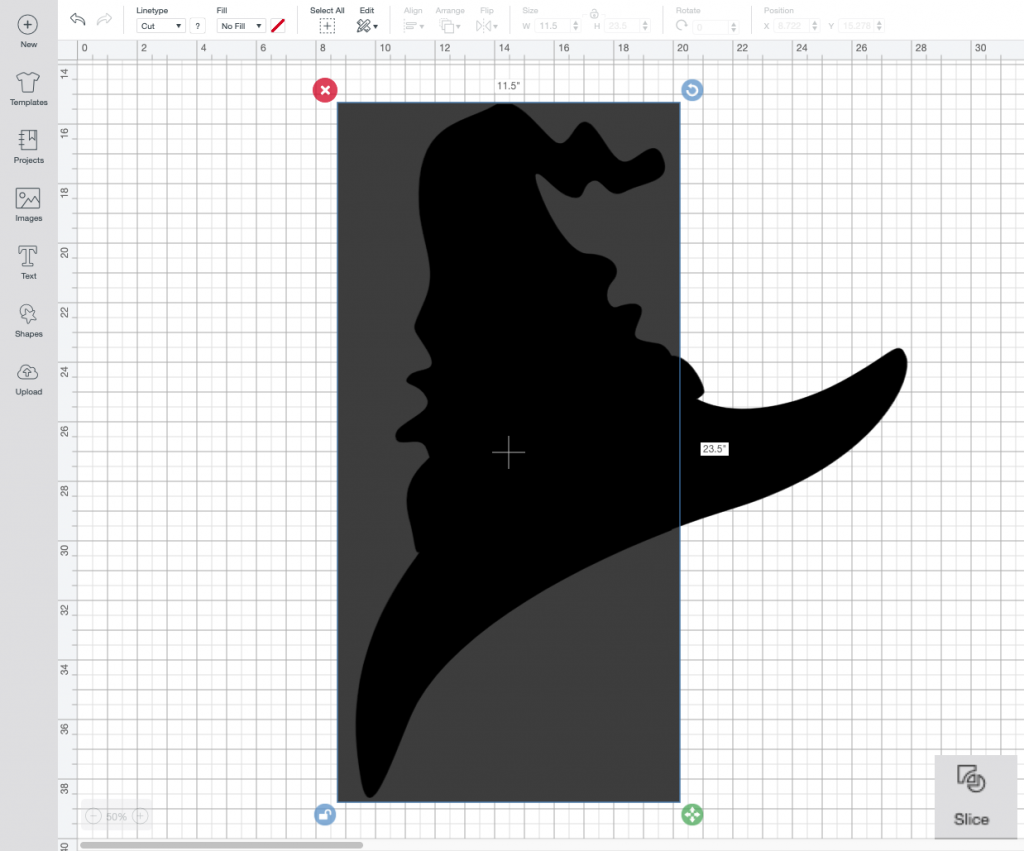
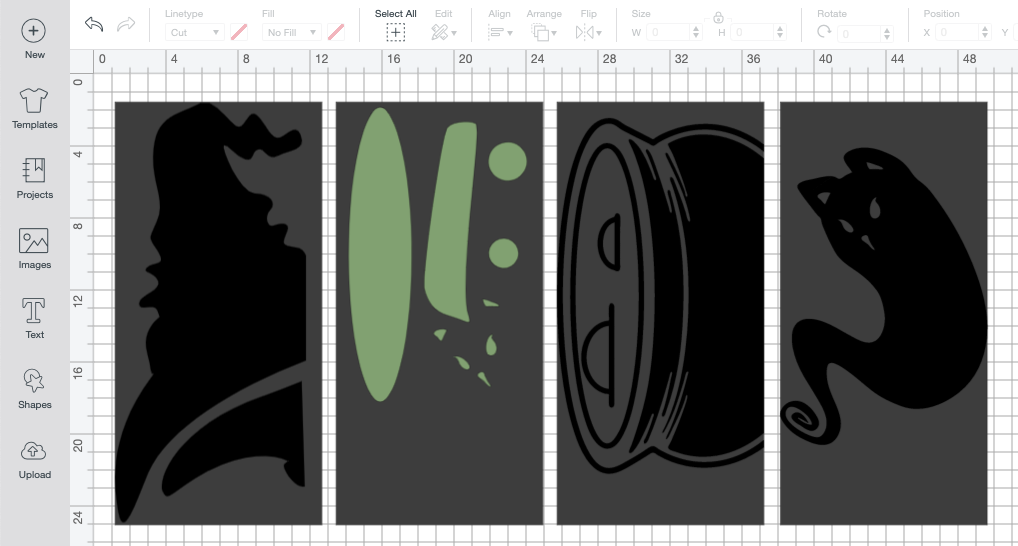
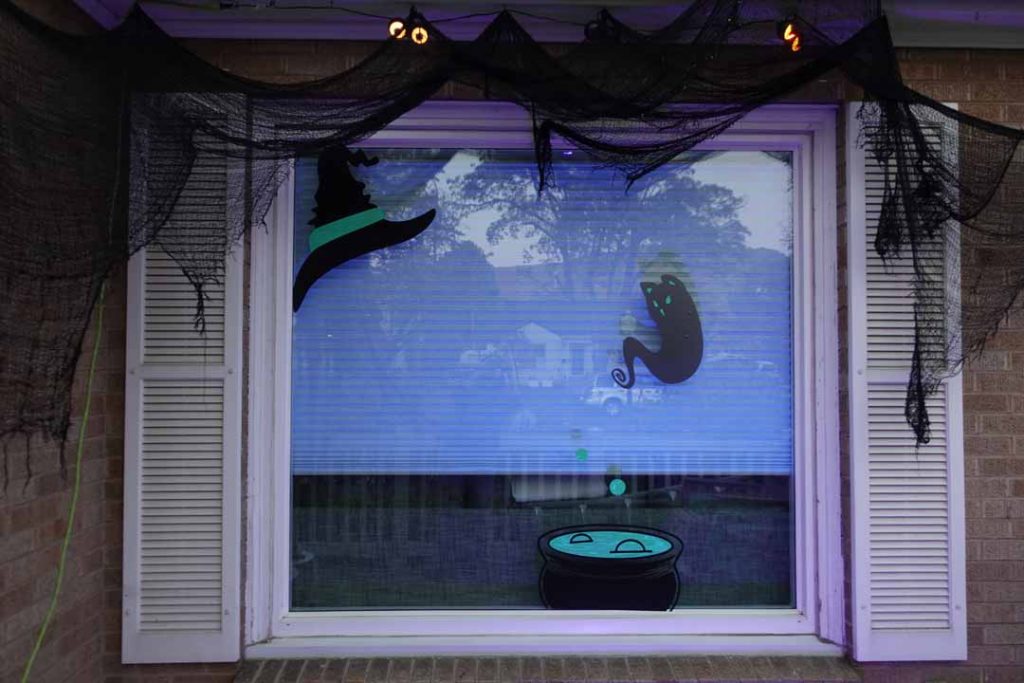
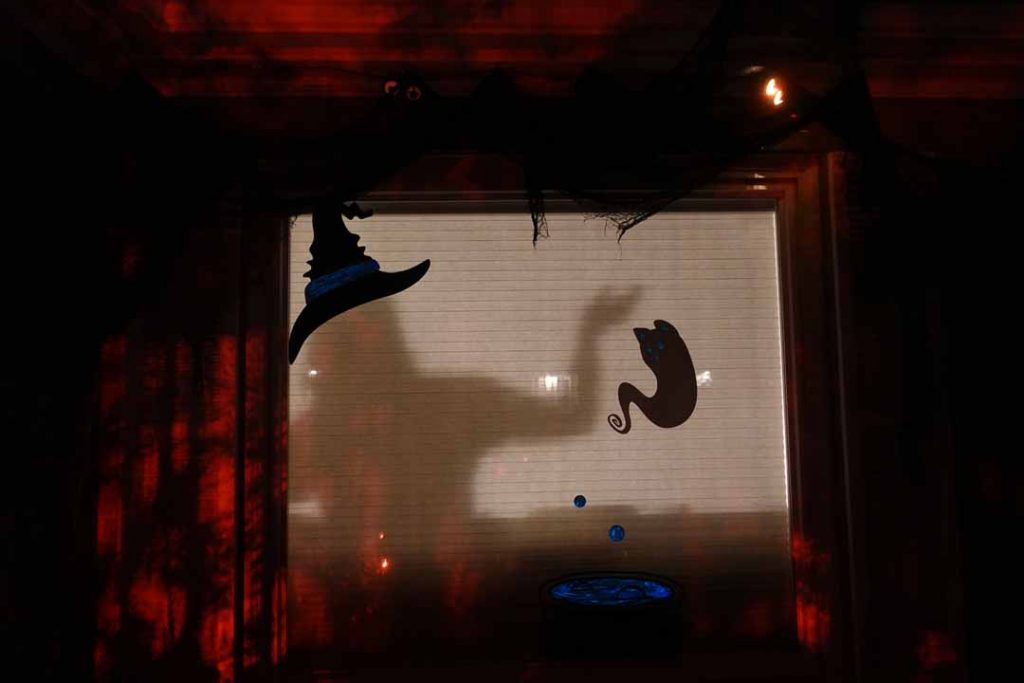
Next, I added images from the library to fill the “window.” I liked the idea of a witches hat (image #M3BCE4) floating over a cauldron (image #ME44290F), so Christi could “step into” the hat whenever she walked across her living room. Then, there’s this ghost cat (image #MF74967C) I found in the library. It had to go into the window too.
Fitting the designs to mat size
The witches hat was too large to cut on my Cricut Maker so I needed to slice it. To do this, I created a “square” using the shape tool and resized it to the maximum cut size for my machine and corresponding mat, 11.5″ x 23.5″.
- If you only have the regular-sized machine mat, your maximum cut size is 11.5″ x 11.5″.
- If you are using a Cricut Joy®, your maximum cut size is likely 4.5″ x 4′ depending on whether you are using a mat or Smart Materials™.
After you slice, delete the extraneous layers from the slice and continue to Make It! If you prefer to save a little of your precious vinyl material, attach like colors and rotate each piece to fit the maximum cut area in the most efficient manner. I like doing this to keep from producing too much waste, but it’s certainly a time suck.
A few bloody handprints for embellishment
What’s a haunted house without a few creepy handprints?
In addition to the window silhouettes, I cut out a few handprints in blood-haunting red to put all over the face of the house. You can easily find these images in the Design Space library by searching “hand print” or “hands,” but here are a few image numbers for you: #M8B3E761, #M8B3E724, #M8B3E758, #MB8CD8D6, #MB8CD8CF, and #MB8CD8BC. Keep the # symbol in the copy when searching for these.

Make it with your Cricut machine
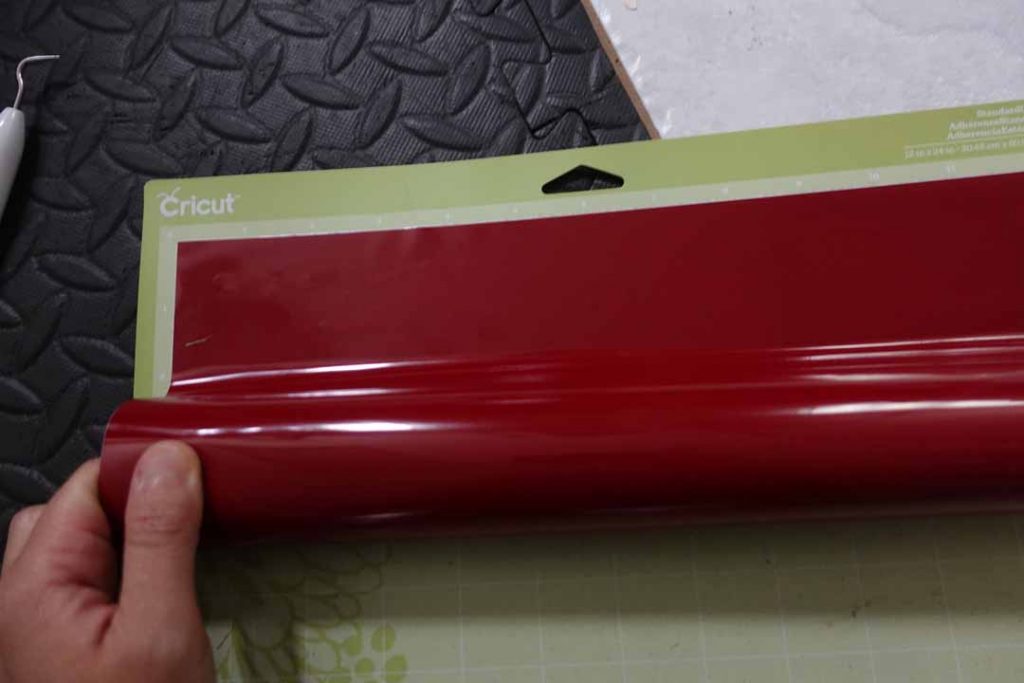
When you have all the elements for your window ready, hit Make It to cut them with your machine. I recommended attaching your vinyl to the top of the mat first. Attach the vinyl as closely to the top gridline as possible. Then, continue rolling it straight down while holding it away from the sticky mat. With rolls of vinyl, this method was easier for me than just placing a big section of unrolled vinyl on top by eyeballing it.
Feel free to use my ready-to-go community Design Space project if you prefer not to start from scratch. Remember, my project is sized for a 70″ W x 65″ H window. You will need to resize it and adjust the images if this doesn’t suit your needs.
- This Design Space file has efficiently attached colors together.
- This Design Space file has a big picture image without being efficiently attached by color.
Add a bit of glow
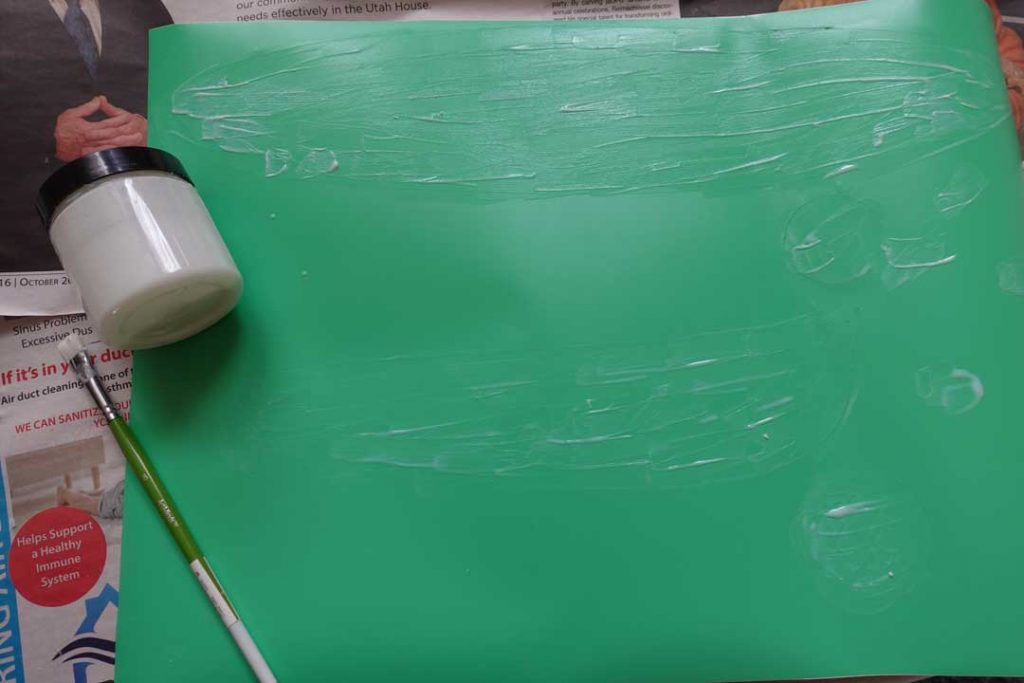
This step is completely optional, but I took leftover glow-in-the-dark paint from my cornhole boards and painted the vinyl before weeding. I just wanted to give the window a layer of pop! And, this was the simplest way I could think of…
After the paint is dry, weed the design or, pluck the simple shapes from the backer to manually stick onto your window.
Make a scene!
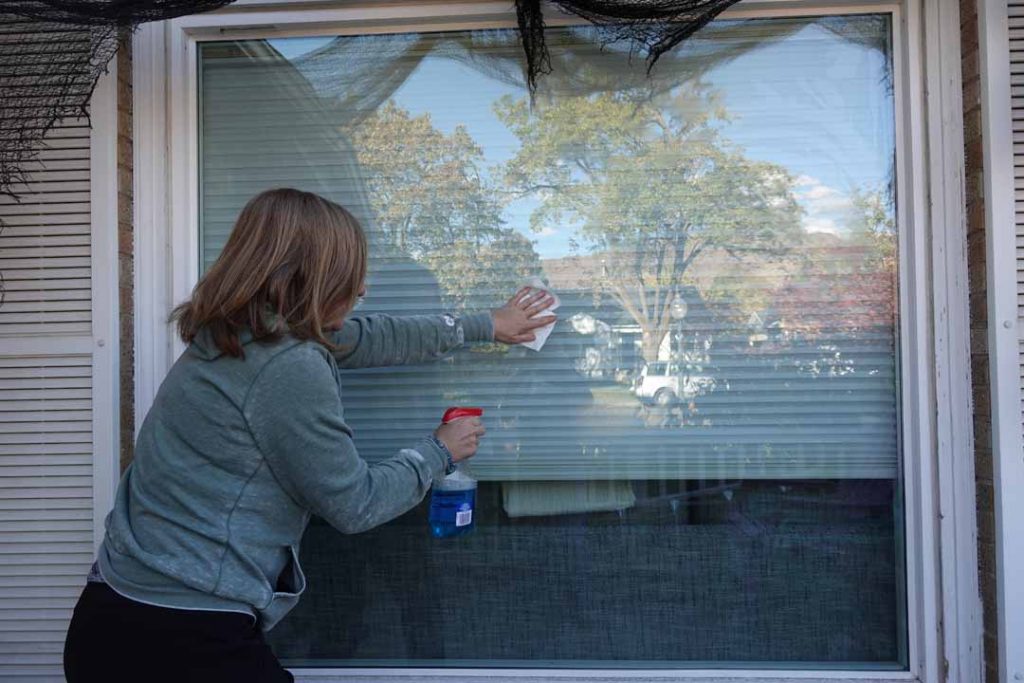
Before we get to the vinyl silhouettes, clean all the surfaces! Wipe off any dirt and particles to get a better adhesion. Yep, I made Christi do the hard work (she’s taller).
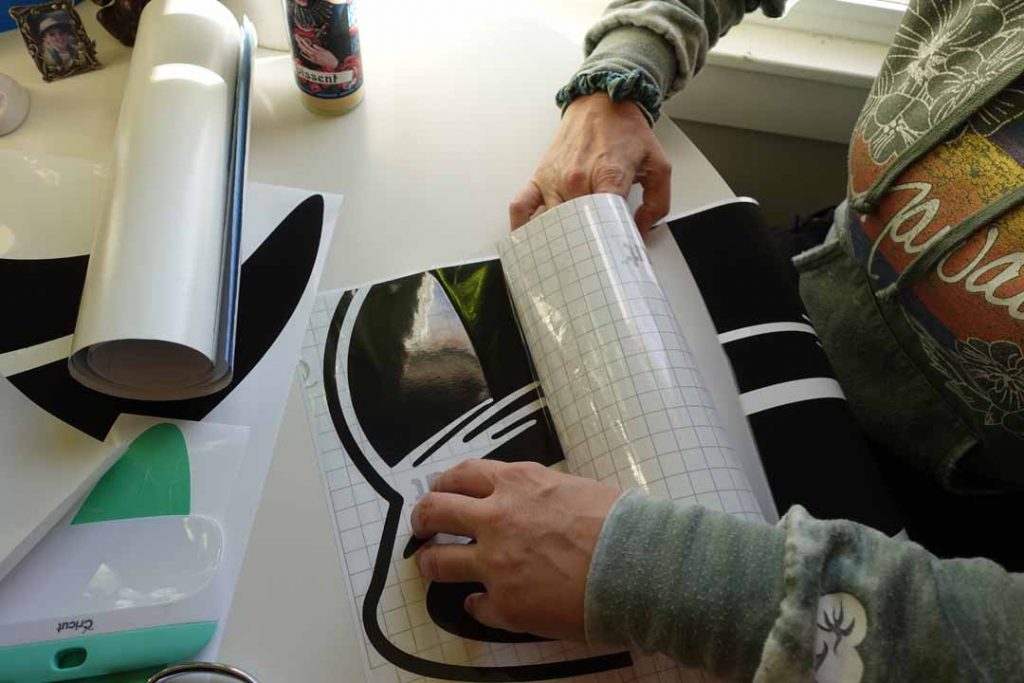
Remove the negative from the backer of each design, or weed it (as we say in the Cricut world), so it’s ready to transfer onto your decoration surface. I used the same method for rolling the vinyl onto the mat as I did for transfer tape. Start with the top edges of transfer tape and roll it onto the design.
For the bigger single pieces, I opted to save on transfer tape and we hand-placed them. I also didn’t want the transfer tape possibly taking off the glow paint I just added, either.
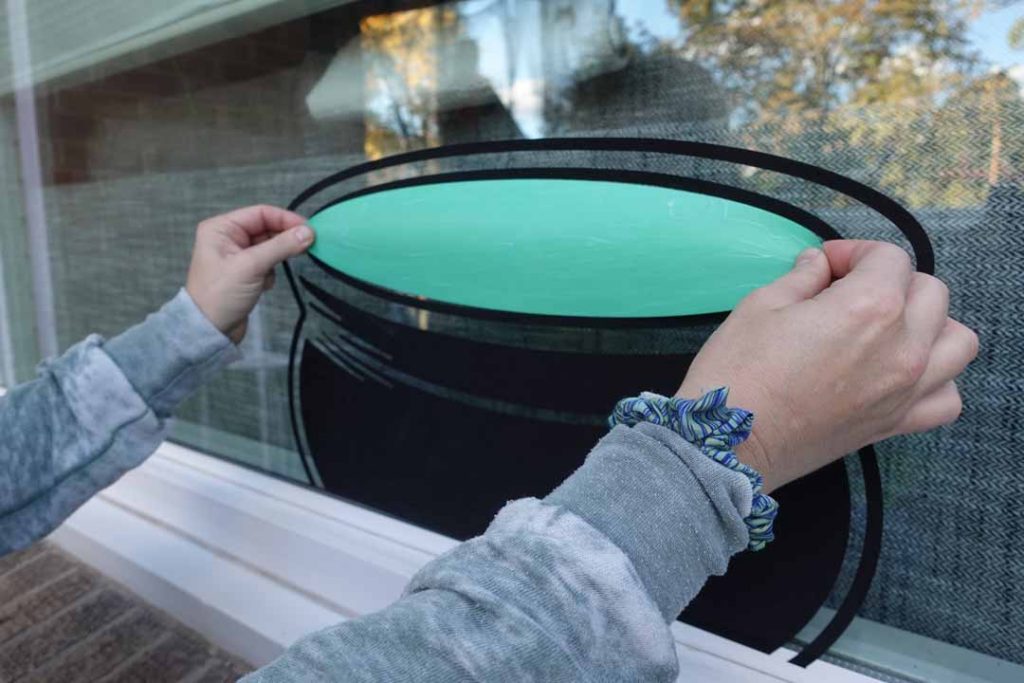
Continue transferring all the designs to the window or surface of where you are creating your scene. We placed the witch hat as far up on the window as possible so that we could get a more realistic silhouette when Christi was inside her home. Did I mention she’s tall(er)?
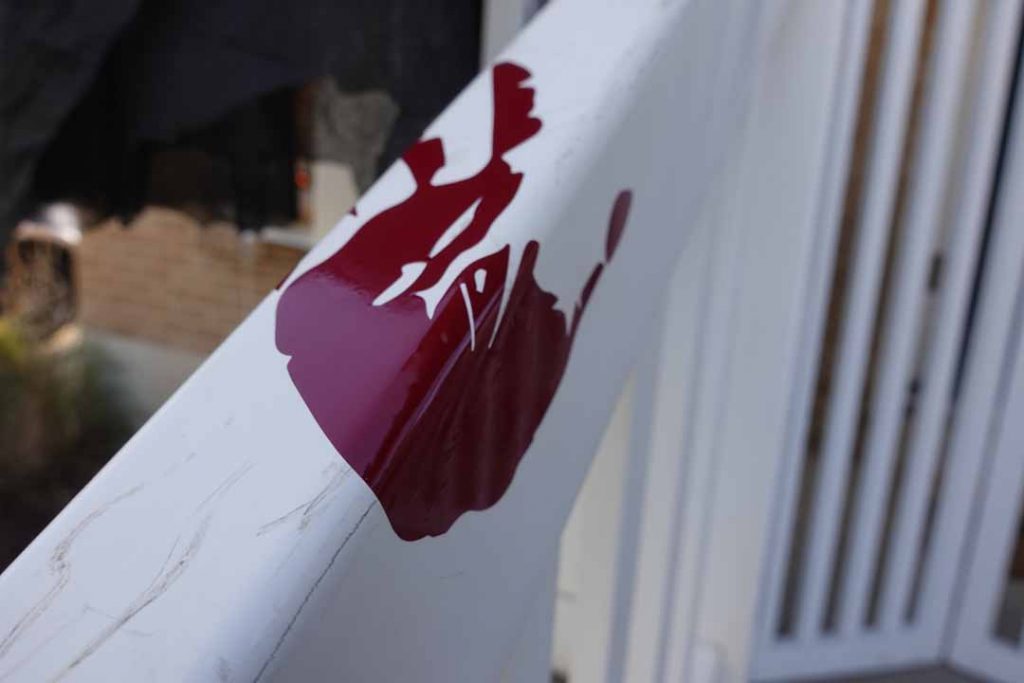
For the handprints, we splattered them onto the stairs and banister. FYI, I pretended to walk up the stairs as if I had bloodied my hands to create the most realistic placement possible.
We also added a pair to the broken bay window (as if someone was trying to get in, ya’ know).
So, what do you think?
We hung out for quite a while in the window, each of us giving it our best practical magic over the cauldron. So, tell me! Who wore it better?
Hit me below with your comments (and by all means, send those who wore it better praises my way). I want to see what you did with your windows this Halloween!
Related Making


Search How-To
I want to make...